• Customer projects completed

    Dapple Dachshund on 28-Count Linen

    Dapple Dachshund on 28 count Lien

    This cute project – a multi-coloured dapple dachshund on 28-count linen – was very difficult. Not because of the pattern or the number of needle changes needed but because of the stitch size. Usually on a 28-count linen you would work as you would for a 14-count aida. So, I began this piece as a 14-count project.

    However, as I began to stitch down the first leg, I realised the little chap would be too big for the material size – what a mistake to make! I managed to get my head around the fact that the stitches I needed to do were absolutely minute – 14 stitches to an inch is fine but 28 stitches to an inch well that is a whole different ball game. But any stitching errors were tricky to rectify so I needed maximum concentration levels. We all know that is never easy when you are working full time and running a busy teenage-filled house.

    You can view other customer projects by clicking here ☺️

    Completing the Dachshund on 28 count Linen

    front right leg

    With the error addressed, I started completing the miniature dachshund’s front right leg. Thousands of miniscule stitched which took hours and hours and hours and hours! One A4 page of pattern down – another three to go.

    Using unspecified threads supplied with the kit, they tanged easily and often needed untwisting or unknotting which is not something that usually occurs with DMC or Anchor threads.

    What to do next? The first part of the head or the other bottom part? Choosing to go up rather than across I started to get a feel for the animal’s character.

    dapple dachshund on 28-count linen

    The dapple dachshund (on 28-count linen) was coming to life. Constantly checking my rows and stitches, I was cross stitching in a way I never had before. Sectioning off the stitching chart and making sure I didn’t go beyond each section ensured I focused on one area at a time. This in turn, meant I could easily check that everything lined up and was in its exact location. Less mistakes equals less time unpicking!

    3 pages of A4 down and one to go.

    Eh voila! Complete.

  • Customer projects completed

    Cat Stack Cross Stitch kit.

    Cat Stack cross stitch kit by Bothy Threads.

    For Cat Lovers Everywhere: Cat Stack cross stitch kit from Bothy Threads.

    Where to buy Cat Stack cross stitch kit by Bothy Threads.

    Kit contents:

    • 14 count white Zweigart Aida
    •  pre-sorted stranded cotton
    •  ‘Lana’ (a woolly thread)
    • a needle
    •  stitching diagrams
    • completion instructions.
    • Finished size 18 by 34cm. This kit uses full cross stitches, backstitch and a few French knots.
    Also available, Dog Stack Cross stitch kit.

    Cat Stack’s one of a series of cross stitch kits developed from original artwork by Kate Mawdsley Kate Mawdsley.com

    The kits fairly straight forward in terms of the cross stitching and backstitch and would be ideal for beginners. All the crosses are full stitches. The backstitch can be completed in long runs, as it is a modern pattern. This makes this the backstitch quicker to complete than some other backstitching designs.

    French knots.

    The only advance stitch you may need is a French knot to complete the cat’s eyes. Once the French knot is mastered, depending on your skill level, the overall effect is wonderful. It really gives each cat (and the birds) different personalities.

    However, When positioning the French knots, be careful not to position them incorrectly. Doing so just makes the cat’s look ‘odd’. With that said, don’t be afraid to undo it and have another go. Try offsetting them from the holes if necessary to achieve the look you require. For a quick tutorial on ‘How to tie French Knots’ See HERE!

    Lana thread used in Cat Stack cross stitch kit

    How to fluff up Lana thread when Cross stitching. Kit example is Cat Stack cross stitch kit by Bothy Threads
    Fluffing up Lana threads for Cat Stack cross stitch kit.
    Image showing fluffed up Lana thread.

    This kit contained a first for me – Lana thread. I have never worked with Lana threads before which made it interesting to use. Also, I found them to be thicker than stranded cotton that’s normally used in most cross stitch kits and has the appearance of pure wool. On completion of the stripy grey cat, the Lana thread’s ‘fluffed up’. To achieve this rub a piece of velcro across it carefully. So as not to damage the yarn but to give it a fluffy appearance. You do need to be cautious about not catching the stranded cotton face and paws with the velcro. I would recommend practising fluffing up the Lana on a spare piece of cloth or Aida as shown in the image.

    Cat Stack cross stitch kit Pattern and Instructions.

    The stitching instructions are very clear and set out the order in which things should be done, both for stitching the design. They also explain how Bothy Threads stitched the design along with some useful top tips.

    The pattern chart is clearly printed on two lots of two A3 sheets of paper.  With one set of two for the cross stitching chart, and the second set for the backstitching and the placement of the French knots. Charts can be marked off as you stitch although I found it unnecessary as the design is in blocks of colour requiring only a few needle changes. Overall Cat Stack was a joy to stitch with different techniques, the use of Lana, French knots and delightful colours.

    Unfortunately, this particular project required the purchasing of more of the stranded cotton owing to the need to unpick my client’s work as sadly it had been started in the wrong place. Also, it was a little tangled so the threads were unsalvageable. This meant that, even though excess threads had been given in the original kit, there was not enough extra of one of the colours.

    Image Showing incomplete stitching. Where to get a Cat Stack cross stitch kit.

    The brown striped cat  (cat 1) with some stitching unfinished while I waited for the cotton to arrive.

    The Threads used in this kit are Mouliné Madeira threads.

  • Customer projects completed

    Love Blossoms by Bothy Threads

    Love Blossoms by Bothy Threads.

    Love Blossoms by Bothy Threads is the second cross stitch kit I’ve had to complete, by them. They have a large selection of other beautiful cross stitch kits that can be seen or purchased here.

    Love Blossoms by Bothy threads 14ct cross stitch kit complete with yarns, instructions and all embellishments.

    Click on the image to Purchase it here.

    The design is on a 14ct Aida and comes with all threads and embellishments as shown in the picture.

    You need to be a fairly competent stitcher to complete Love Blossoms. It comes, complete, with metallic silver and gold yarns that from previous experience I know are difficult to work with. They kept snagging, separating and tangling as I pulled them through the Aida but found using them in shorter lengths meant I wasted less.  I would not, therefore, recommend the kit to a beginner. Of course, you could swap the silver thread for a light grey and the gold for a beige brown but I think it’s worth sticking with the metallic threads because the overall effect is beautiful.
    Securing the threads is difficult because of the spacing between the separate sections. You must not be able to see them from the front. However, with careful planning, it is possible but it will increase the amount of time it takes to complete each section.

    Back Stitch.

    The backstitch, although time-consuming, is what makes this project come together. Each separate flower, leaf and butterfly suddenly become transformed into this extraordinary piece of artwork. This together with the backstitching of the word LOVE at carefully positioned points in the tree canopy make this, I think, the most detailed and gorgeous project I have worked on.

    Embellishments.

    You add the embellishments (lace flowers, plastic flowers and gold beads) when you’ve completed everything else. Surprisingly they were a lot easier to apply than I first thought they would be. Keeping them in place requires one or two simple stitches, explained in the stitching pattern. Love Blossoms comes with an assortment of embellishments which means you will have spares if you follow the pattern.  However, you can add more to create a more personalised finish to the project if you so desire!
    Love Blossoms by Bothy Threads is hard to complete. However, I am extremely pleased with the finished result. You will need patience and you will have to follow the pattern accurately. For tips on how to do this see my cross stitch tutorial. I would not recommend this kit to a beginner however an advanced intermediate should have no problem completing the cross stitch kit.

    2 years later…..

    The cumstomer contacted me again to add in the names and date to finish this project off. The colour theme for the wedding was gold and forest green. They sent me the coloured yarns to co-ordinate with this but couldn’t decide which colour to complete the writing in. I stitched one name in gold and the other in forest green. You can buy DMC threads at AMAZON UK or AMAZON USA . Of course, I sent photos to the client who made the decision to have the backstitch for both names and the date in forest green because it stood out more against the white aida. The heart, in between the names, I cross stitched in gold and outlined in forest green whilst the hearts between the date were completed in red. Unfortunately, due to privacy reasons, I am unable to add a photo of the completed project.

  • Customer projects completed

    Bedtime Boofle Bear DMC BL1014/48 Sampler

    I have now completed my next project, another lovely kit by DMC, called Bedtime Boofle Bear. It will now be winging its way back to its owner in the UK. Dmc have a wide range of beautiful cross stitch kits which you can view or purchase here.

    Bedtime Boofle Bear sampler.

              You can buy this kit here.

    What’s in the Bedtime Boofle Bear kit?

    This Boofle Bear Sampler is a 14 Count Cross Stitch Kit
    and contains the blank Aida, needle and presorted good quality threads along with fully charted instructions.

    The kit is quite easy to complete and I would suggest that it is ideal for anyone who has had some cross stitch experience because there are some half stitches and quite a lot of backstitch detailing which I found quite fiddly particularly on the stars. I preferred completing each star as I went because the thought of having to go back to it was quite daunting.

    Bedtime Boofle Bear cross stitch kitFor customer privacy, I have had to scribble out the name and date of birth of the lucky little girl.  I did find that the name box on the sampler only allows you to place your child’s first name. However, with some adjustment, I managed to fit the date of birth also as requested by the customer.
    There are several beautiful Boofle Bear kits by DMC, like this one – which you can view by clicking on the large image above. Having looked at them I think Bedtime Boofle Bear, for me, is by far the cutest.
    As with most of the DMC kits I have done, this one had easy to follow instructions and stitching charts. As with all DMC kits, the threads were of a very high quality.
    If you would like to purchase this kit for yourself you can do so by clicking the link in the picture at the top of this page.
  • Customer projects completed

    Cross Stitch Pako Dolls House.

    Cross stitch Pako dolls house.

    This cross stitch Pako dolls house is my most challenging project to date.

    cross stitch Pako dolls house

    Pako Dolls House cross stitch kit
       Purchase the original kit here.

    This was, by far, my most intricate project to date (excluding Tinkerbell which was my own personal gift to my daughter and can be seen here as an earlier project).

    This cross stitch Pako dolls house came as a homemade kit. It contained a photocopied set of patterns and DMC yarns. All colour codes had been customised to suit the threads available with some needing improvisation to complement the design. This required me having to purchase a few extra coloured skeins at cost.
    The photocopied patterns were of a poor quality and appeared to have been stored for quite some time. Therefore before starting a lot of research was required to ensure that everything was correctly placed and all the correct colours and back stitching were in the right places.
    Some of the cross stitches had been started using a single thread of yarn which I have shown below.

    The first thing I needed to do was to check the cross stitch for alignment with the pattern. Once I was sure that everything was correctly placed I could start the dolls house. Firstly completing the outline of the building and creating each separate room within the design. I started with the top left attic room and then carefully worked my way across and down the building, first doing all the cross stitch and then the back stitch so as to make sure each room was complete before I moved onto the next to ensure minimal contact with the stitching already completed. You can see my progress in the images below.

    Dolls house the second floor.

    With the top floor attic rooms now completed I moved on to the second-floor nursery and bedroom. With the staircase being already started it just left the dark brown cross stitch and back stitch details to add.

    Following on from the nursery and bedroom I then did the first-floor master bedroom, landing and bathroom.

    Dolls house first floor.

    Dolls house ground floor.

    My next task was to tackle the ground floor study/parlour room, kitchen and front door.
    I first tackled the stonework detailing and handrails followed by the kitchen, front doors, study/parlour and then the steps. Lastly, I added the garden details.

    Due to the intricate nature of the cross stitch pako dolls house project and because I had to cross reference the pattern I had with the information I’d found on the internet, I made sure I completed every detail in each room before I moved on to the next section. This included all cross stitching, half stitching and back stitch.
    I would not recommend this kit for beginners due to the size of the item. With a good quality pattern to follow each room is fairly simple but the eye for detail and level of concentration required is not for the faint-hearted. If you would like to try the kit yourself you may be able to purchase it by clicking on the image below.

  • Customer projects completed

    Letters by Hobbycraft. Cross stitch letter kits.

    A simple little project of Letters by Hobbycraft.

    Letters by Hobbycraft

    I am currently working on a large project at the moment but every now and then I like to take a break and do something different to keep things interesting. So when I was asked if I could fit these 4 Letters by Hobbycraft into my schedule I was more than willing to help. Other lettering kits can be purchased here.
    As you can see in the picture they are all individual kits. Each contained a pattern, Aida a needle and plenty of thread. Although both the Aida and Thread were, in my opinion, of poor quality.
    They a pretty simple to do but you need to concentrate and also pay attention to the pattern.  I found the T had a stitch missing off the pattern that was clearly shown in the picture. The thread had a tendency to knot up, so be careful when pulling it through the Aida.
    Below you can see the finished letters that are now back with the customer.

    If you look closely at the T you can see there is a stitch missing on the top right-hand side. This, I stitched according to the pattern. However, on the front picture of the kit packet, the letter T had an extra stitch on the top right-hand side. In the image below it has been added, as per the customer’s wishes.

    Please view my other customer projects here ☺️

  • Customer projects completed

    DMC Irises Kit CK4151

    DMC Irises Kit  CK4151

    DMC Irises Kit number CK4151 kit that arrived partially done as shown below.

    DMC Irises Kit number CK4151

    This DMC Iris’s Kit number CK4151 is was very similar to kits that I have done before. The approximate size is 25.5 x 30.5 cm and it is on 14 count Aida fabric. It comes complete with pattern Aida and DMC yarns.
    This is a fairly easy kit to complete. However the hardest part, I found, was finishing off the leaves – all of which interweave with each other. Adding the flowers in their bright vibrant colours and the intricate detailing on the bowl meant the overall result, with time and patience, was beautiful.

    DMC Iris's Kit number CK4151 cross stitch kit.

    Buy DMC Floral cross stitch kits.

    View my other customer projects here

  • Customer projects completed

    Baby sampler redesign and restart.

     Baby sampler redesign.

    This baby sampler redesign and restart certainly was a baptism of fire as it was my first commission.

    My first cross stitch finishing request is from a lady in the USA.
    Clients project description.
    The project is 31 x 26 1/2 cm and eight colours.
    I will provide all materials needed.
    No other details were provided.
    She is waiting for a hip replacement, could not find the time to finish the project so was looking for someone to finish her cross stitch for her.
    It’s a baby sampler that I think was started over ten years ago for her grandson but was never completed.
    It arrived by priority mail and without knowing any more than what the client had described I opened the package.
    On opening the parcel I noticed straight away that I will have my work cut out with this one.
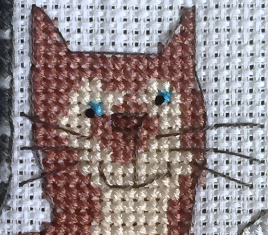
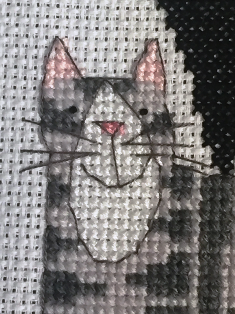
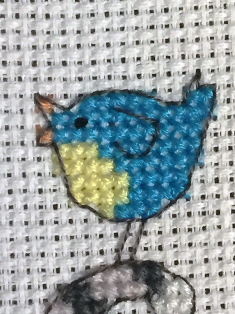
    As you can see in the image, the project is already started.
    It came with a picture of the finished design which was intended for a girl whose name and date of birth I have blurred out for privacy. This can be seen in the next set of images.

    Baby sampler redesign and restart

    The baby sampler redesign request is for a boy, who’s details were enclosed on a piece of paper.
    It had a rough hand drawn stitching pattern. A few random coloured yarns that were far too dirty to use. They were also covered in dust and what looked like animal hairs tangled in the weave of the threads.

    As you can see the pattern was also a little worse for ware and unfortunately did not quite match the design of the original which I had to copy, shown in the picture below.

    So begins my baby sampler redesign.

    After consulting with the client via email that I would need to use all new threads, I was told to do whatever I thought necessary to finish the project.
    I first decided to make a new pattern that was to scale with the original picture dimensions that were supplied. To follow the original pattern, and to make it match the design supplied was a task I did not fancy.
    After careful study and measuring of the original pattern, using the project dimensions the client had supplied I set about my baby sampler redesign. I calculated that the stitch count was 10 so I began to redesign the pattern on a 10ct grid as shown below. The colour coding shown is for reference and not necessarily the final colours I chose to use.

    Recolouring the yarns.

    Before starting I would also need to change the colours of the yarns slightly. Being that the new design was for a baby boy, not a baby girl. So the first thing I did was carefully choose new yarns to swap out all pinks for various shades of blue.
    Then, by lining my pattern up with the supplied picture I was able to create a more accurate new design that closely matched both the supplied picture and was also close to the original hand-drawn design, as I also found a lot of stitches had been missed out on the original girl’s sampler.
    Also, I would need to do a little more scaling and defining on the bunting and loop detail.
    I chose to do this on a separate transparent piece of paper. It will then be overlayed onto my design in place of what is shown in the above pattern as I was not happy with the overall proportions and look of the original balloon. To me, it seemed a little cluttered.

    Washing the Linen fabric.

    The next thing to do was to thoroughly wash the supplied fabric in lukewarm water as it was badly stained, covered with animal hairs and far too dirty to work on.  The fabric was washed at 40 degrees with a mild detergent although I also thought about just replacing it. After some consideration though, I decided the client would want the same fabric that the girl’s sampler was stitched onto.
    With the fabric now clean after 2 washes and ironed flat I was ready to copy my design onto a soluble stabiliser before laying it onto the cloth ready to receive the stitch work.

    This seemed like a simple design at first but I soon realised that was not the case. There was a lot of embroidery in the balloon along with satin-stitch, some hoops, chain-stitch and French knots all to add some detail to the design.
    I also used an embroidery hoop to keep the fabric at the right tension without permanently creasing its edges. I think in future I will use a larger rectangular frame to hold the whole larger designs in place.
    Slowly and carefully I worked my way through the design. This incorporated some stem stitch into the ropes on the balloon, the wire on the plaque held by the bird and onto the stems of the flowers at the base of the balloon, with some more satin stitch and French knots to form the detail on the ends of the butting design and in the birdseye. I also used a smaller hoop to do the bird detail and plaque.

    The next thing to do was to move my hoop and start on the banners containing the writing.

    Almost complete.

    I am now on the home stretch having completed all the satin stitch in the banners and with only a little more stem stitch left to finish them off. Finally, there’s some random straight stitch in two colours to build the highlights in the babies hair.
    It’s now complete, awaiting the client’s approval and ready to be packed then mailed back to the USA.
    This was an interesting little project. A little testy at first but once It started taking shape it was worth the effort to get it right.
    Below you can see the original design.

    My interpretation of the Baby sampler redesign.

    Thank you for reading my post.