A cross-stitch re-stitch project.
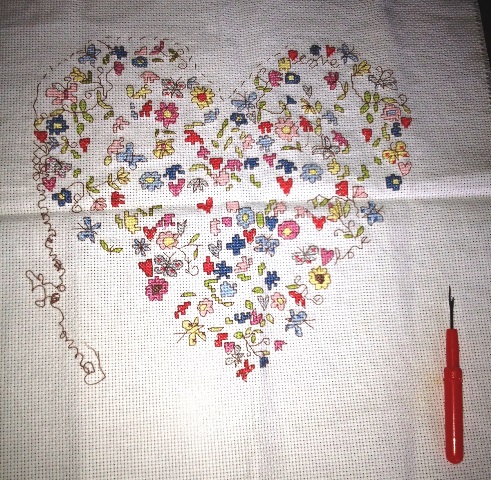
The kit, called Love Heart by Bothy Threads arrived almost completed. However the kit needed our immediate attention as our client contacted us because they had got themselves into a real pickle with the design and the backstitching, as shown below.

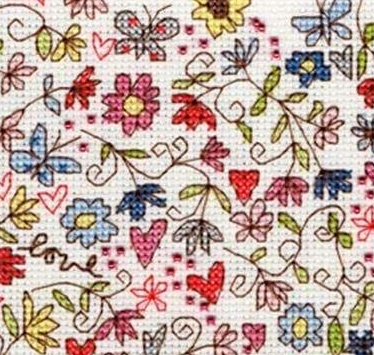
With kits like the Love Heart by Bothy Threads as shown, it is so easy to lose your way as the designs fairly intricate in that it involves a lot of strategically placed blocks of individual colours to build up the design. These blocks are then transformed into shapes and images once the back stitch is applied as can be seen in the close up sample of the design shown below, This image shows both the blocks of colour and how the back-stitch transforms them.

How to unpick cross stitch.
Example used Love Heart by Bothy Threads.
The first image shows the initial unpicking of the back stitching which our client had completely lost their way with.
When unpicking any type of stitching it is important that you do not catch the fabric. Catching the fabric and cutting the weave can be disastrous for your project. Sometimes if you are lucky or have a solid image you can hide the mistake but when unpicking a project such as Bothy Threads Love Heart which has spaces between the design, any Knicks in the Aida can ruin the project. This can result in the needing a new piece of Aida and having to start the project all over again.
<iframe style="width:120px;height:240px;" marginwidth="0" marginheight="0" scrolling="no" frameborder="0" src="//ws-eu.amazon-adsystem.com/widgets/q?ServiceVersion=20070822&OneJS=1&Operation=GetAdHtml&MarketPlace=GB&source=ss&ref=as_ss_li_til&ad_type=product_link&tracking_id=arts-store-21&language=en_GB&marketplace=amazon®ion=GB&placement=B07CTVQR7D&asins=B07CTVQR7D&linkId=f2a67fa672a3be3780a599869ac398e9&show_border=true&link_opens_in_new_window=true"></iframe>When unpicking I prefer to use a stitch unpicker like the one shown. I find this type useful to get under the stitch before using the sharp edge on the inside edge to cut the stitch. However, on the back I prefer to use a fine needle to pick my way back through the stitches. I always try to follow the run of stitches and am careful at all times not to catch the fabric. I use a needle on the back as I find the stitch picker tends to be a little too wide for cross stitch. Especially if the stitch work is tight against the back of the Aida.
Following a cross stitch pattern.
With the majority of the back stitching now removed the next thing I noticed was that a lot of the blocks of colour were out of place. Several of the blocks of colour where either too high or too low. This was due to the client losing their way when following the pattern.
Bothy Threads Love Heart, how to follow a pattern.
When following a cross stitch pattern, especially one that has small blocks of stitch detail dotted all over it it is very easy to lose your way. With a pattern like this it is imperative that once you have established your center point you keep a close eye on all parts of the detail. Continually count each square as you stitch. Pick a point of reference then check and double check to ensure that all parts of the design are in the correct locations.
Never guess or assume where something goes. Once you are one square out, that’s it, everything else in the design from that point on will be wrong. Trust me, there is nothing worse than having to go back and alter everything. I admit that sometimes you can cheat a design with a little improvised cross stitch or back stitch. But with that said, on most occasions this will not be the case.
Rebuilding the Love Heart.
With all the obvious unpicking done I then looked carefully at the stitch pattern and checked it against the project. This was done so that I could establish a point of reference on the project to work from. The partially completed red flower at the bottom of the Love heart design was where I chose to start. Firstly I unpicked and then relocated and re-stitched the flower. Once completed I started redoing the backstitch while counting my way up the right side of the heart. Cross referencing the pattern and checking all the original stitching to make sure it was correctly located.
When coming across a part of the design that was wrong I either added to the design or relocated each block of colour until I reached the top right of the Love Heart. However, in order to maintain the integrity of the project I left as much of the clients work intact as was possible, despite it being slightly out of place. Mainly because I wanted to retain the clients personal touch in the work. It also did not distract from the overall design. With some minor tweaks to the back stitch it all worked well. Next, I carefully made my way across the love heart and up to the top left until all the corrections had been made and all the back stitch worked correctly.
How to add beads to a cross stitch design.
Example used, Love Heart by Bothy Threads.
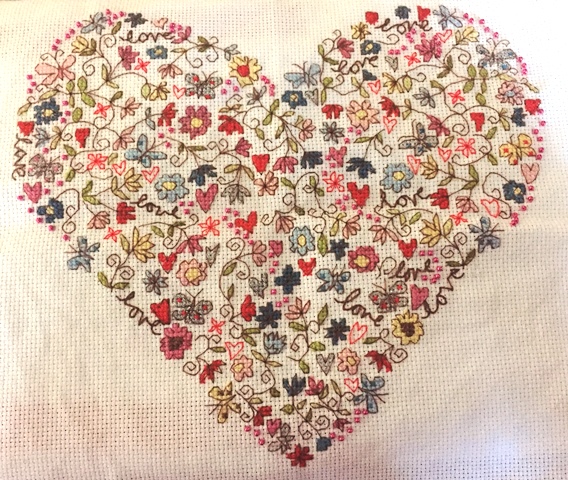
With the whole cross stitch Love Heart stitch work completed the next thing to do was to add some beads. To add the beads, first, locate their position on the design. Next sew from the back through the first hole in the Aida where the beads located. This can be either the top right or top left. Next pass your needle through the hole in the bead and then back through the opposite hole on the Aida. Either the bottom right or bottom left. With that done next sew back through the opposite hole on the Aida and back through the bead finishing at the opposing top hole to form a cross and fix the bead in place.


There’s several similar kits available from Amazon.co.uk or below.
This is the second Bothy Threads cross stitch kit based on the art of Kim Anderson that I have done. The last kit, called Love Blossoms can be seen in a previous post.

Hi. I don’t suppose you know the colour number for the back stitch thread? I need to get some more Thank you in advance
Hi Corinna,
Unfortunately we do not have a copy of the stitch chart for this particular piece but if you contact Iona on info@bothythreads.com I am sure she will be able to help.