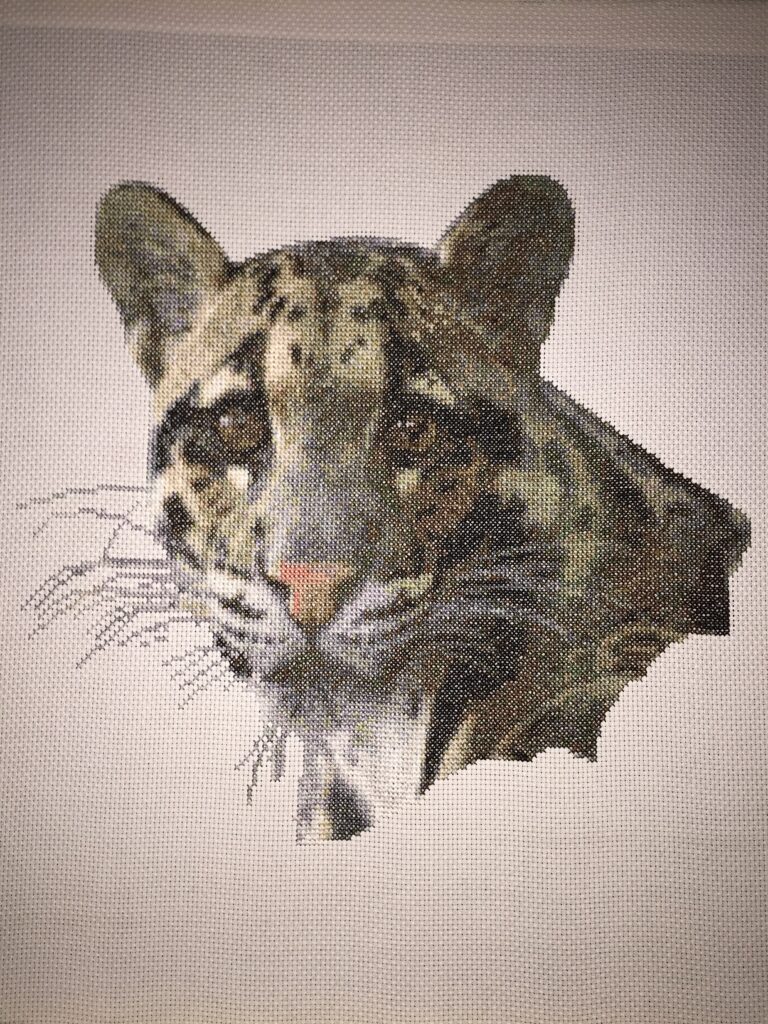
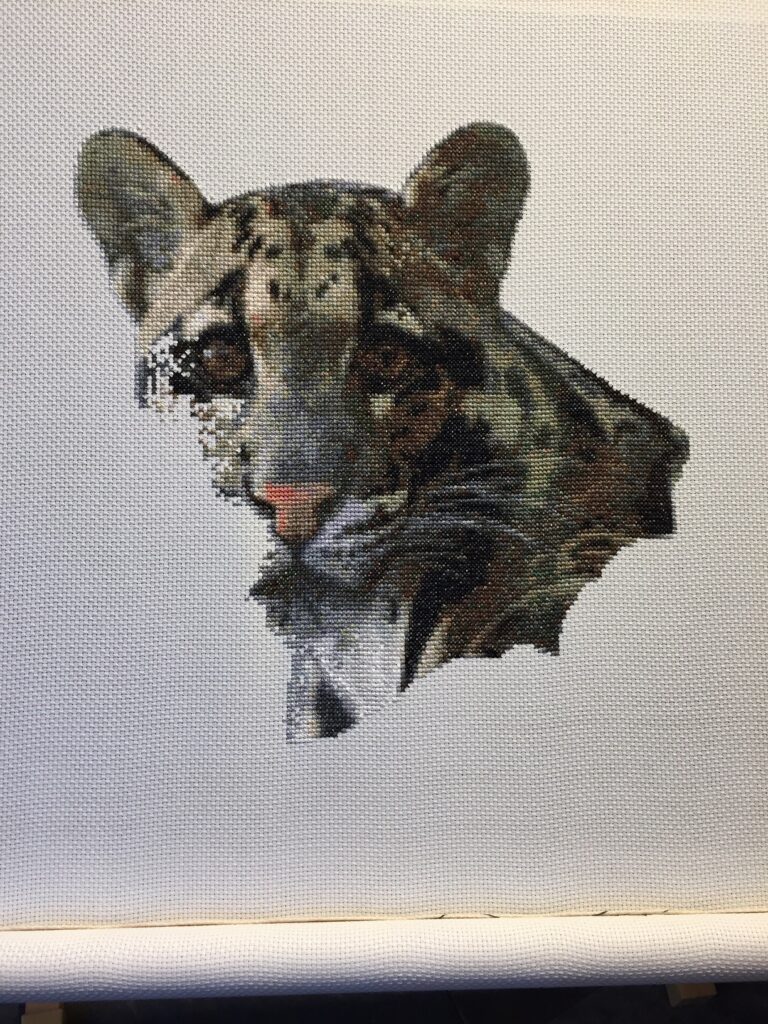
We created this Clouded Leopard Cross stitch kit using a photograph provided by a regular client. For more details please see our Photo to cross stitch finishing service.
Firstly, on receipt of the image we edited out the background. The Leopards head was then edited to suit the design and dimensions in keeping with a set of Big cat cross stitch kits that the customer already owned. A previous project completed from a professional kit can be seen here.
After agreeing upon a suitable edited image we produced a selection of pattern options. Each pattern contained a varying amount of colours giving varying levels of detail.
To achieve the desired look the client chose the pattern which required fifty different colours of yarn. Following that we produced a pattern and colour chart then proceeded with the project.
Starting the Big cat cross stitch kit.
Firstly, we stitched a fat quarter of Aida onto a sewing frame. Then the Aida needed tightening giving it a drum like quality.
Next, both the pattern centre and Aida centre needed locating before commencing the stitch work.
Stitching a big cat cross stitch kit.
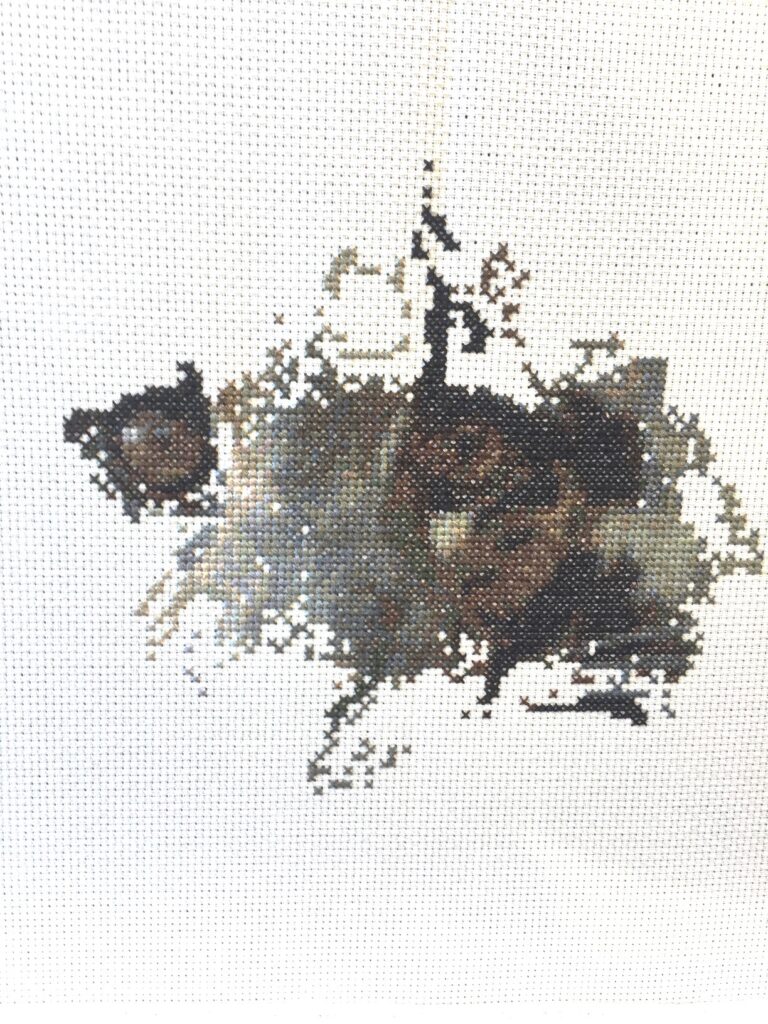
With everything ready we first focused on the eyes as they were crucial to the overall look of the piece. These would help create the realism that we were looking for so it is crucial to get them right. As shown in the image, the left eye worked beautifully however, the right eye seemed a little dark. Adjustments would be made once the design neared completion. Being a custom piece it would give us a better idea of the overall look thus enabling us make the correct adjustments.
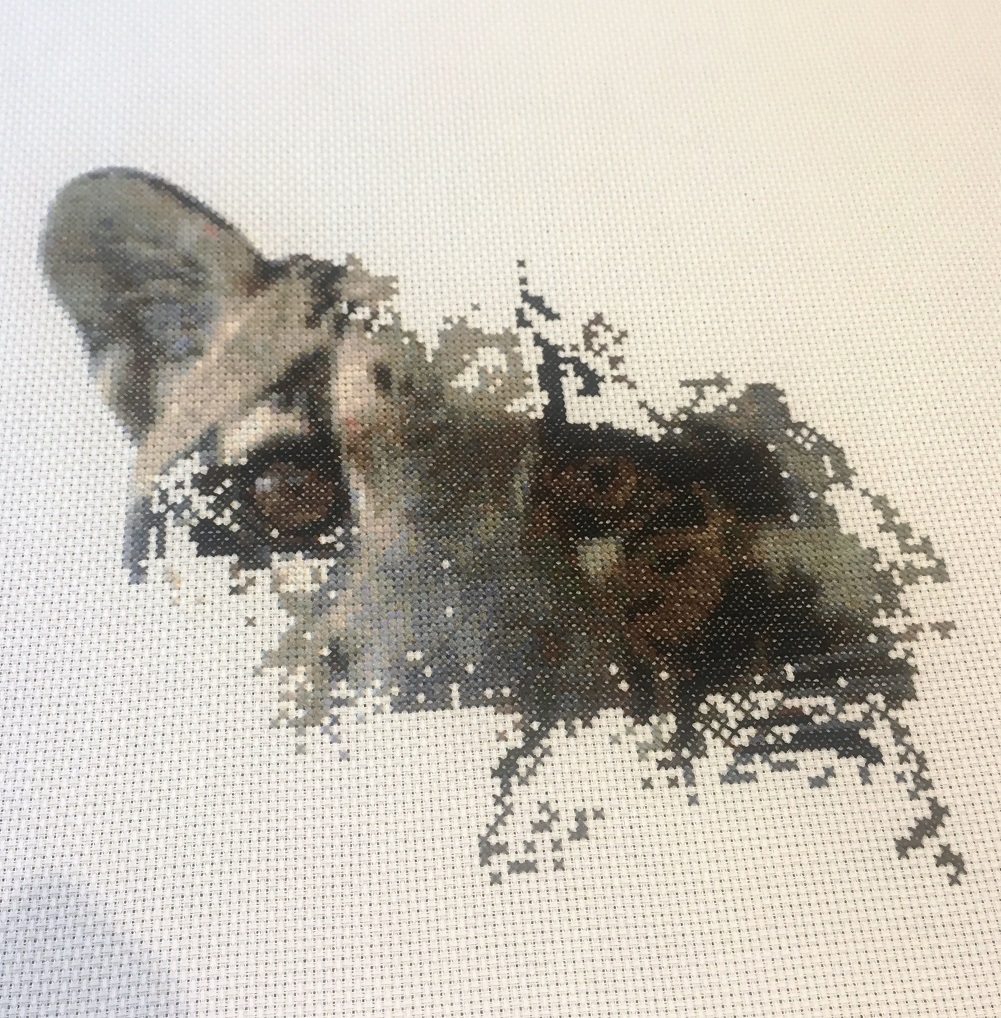
The next thing to do was to stitch to the top left of the image. This would add the Leopards ear and create the initial curve of the head. Doing so makes it possible to stitch from left to right slowly building the cross stitch design
Top half of a clouded leopard cross stitch kit.
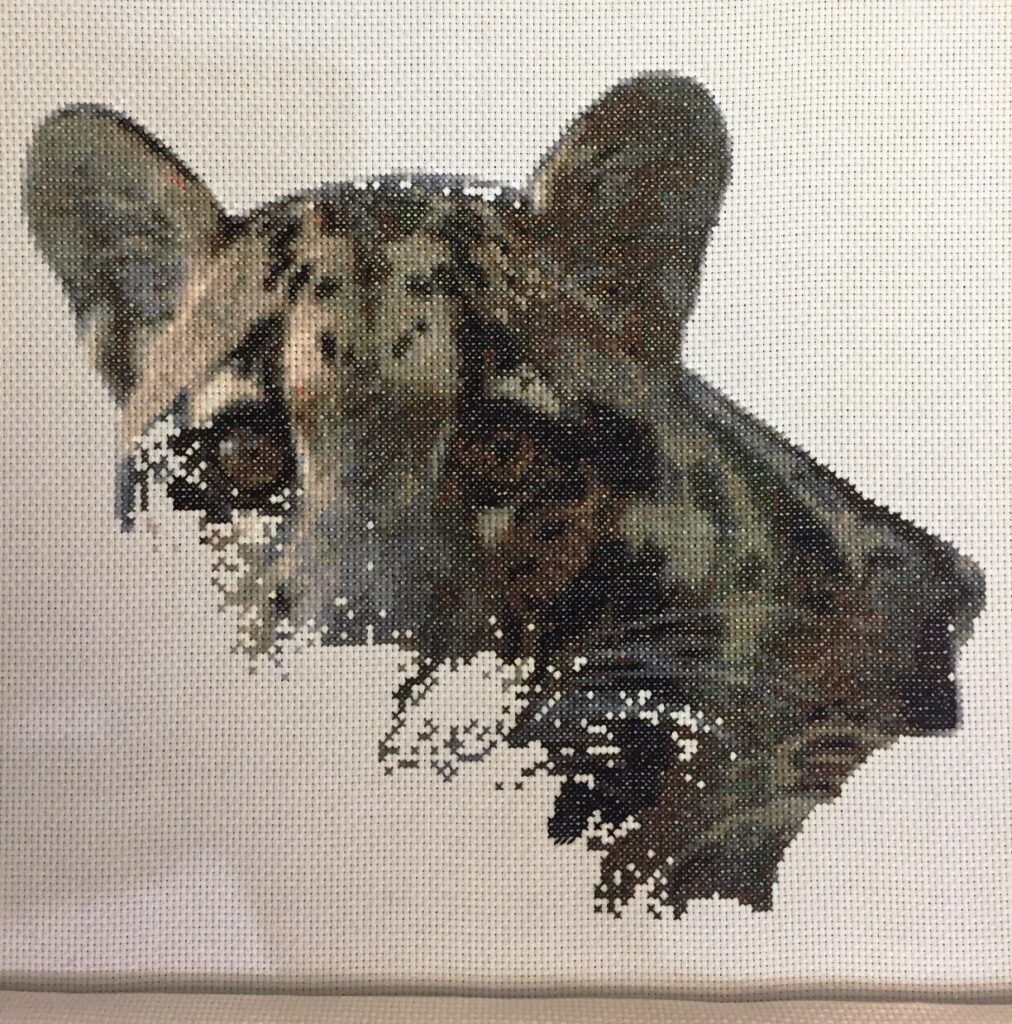
In the next image the right side of the Leopards head is almost complete. the whiskers are now becoming visible and the likeness is now starting to form but the realism still isn’t quite there yet.
Completing the Clouded Leopard cross stitch kit.
In the following two images you can see how we continued across to the left side of the Leopards head, first adding in the Leopards muzzle and nose to bring more life, realism and definition to the face and then continued across and back up the face before finally adding the whiskers to finish off the Head. Lastly, we unpicked the right eye, restitched it using lighter colours, added reflection to bring it to life and finish the overall look.
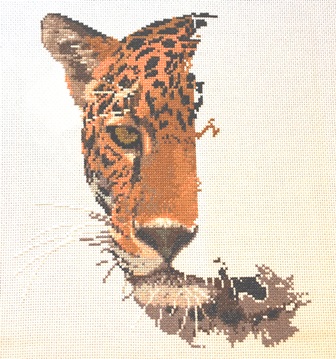
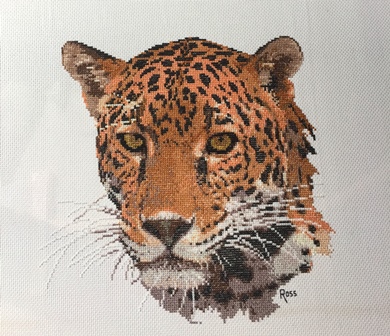
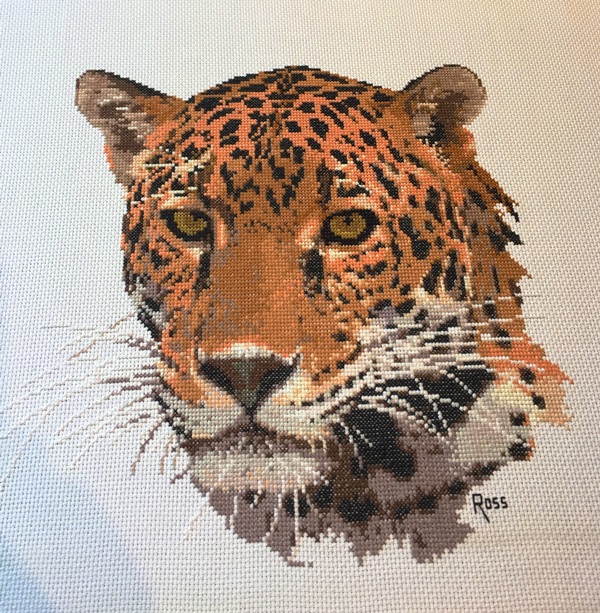
This Ross Originals, Jaguar cross-stitch pattern has to be one of my favourite pieces to date.
This Jaguar cross stitch design is one in a big cat series that also includes a Lion, Snow Leopard, Tiger, White Tiger and Panther by Australian cross stitch designer Graeme Ross. The design can be stitched on 18ct Aida, 16ct Aida or 14ct Aida.
Who is Graeme Ross?
Graeme Ross was an artist and designer who created the Ross Originals cross-stitch designs that included many collections such as birds, animals, floral designs, homes and scenery, tropical fish, butterflies and many others.
I stitched this particular design on 14ct Antique white Aida at the clients request to be in keeping with ones that they had already completed. The design itself requires the use of 20 stranded cotton skeins.
Graeme Ross Jaguar Cross-Stitch pattern.
Ross originals, pattern symbols.
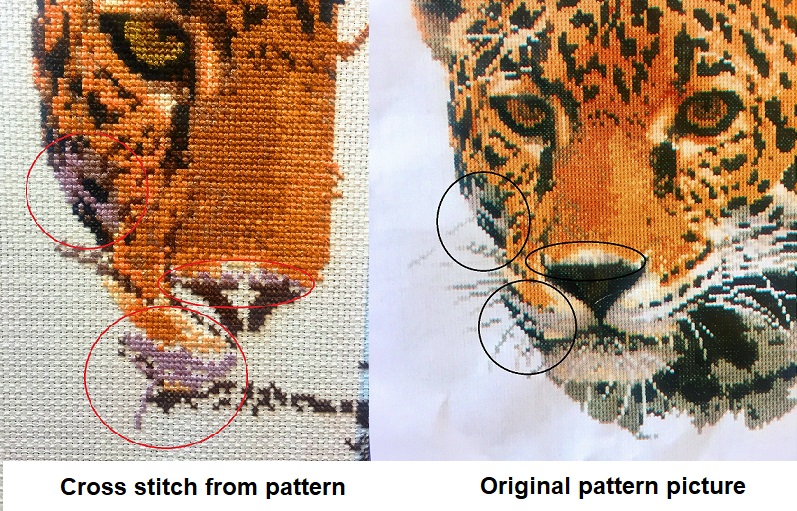
The pattern has a hand made feel and the design contains 20 different symbols that denote each coloured thread used, listed in the bottom left hand of the pattern. However during the stitching I believe there is a typing error for at least one of the colours: this being DMC 3042 which is a lilac colour. However I felt aesthetically it should have been DMC 3024 which is more Grey and in keeping with the overall design. Please see below.
There are also two separate thread codes for both Anchor Threads and DMC Threads. Personally I found some of these symbols a little hard to decipher. First I thought that as I was using a photo copy to work from the printer may have printed incorrectly. However with that said, on inspection of the original design the same discrepancies where also visible on the original pattern.
Also concentration and a certain degree of skill’s required when following the pattern. There’s many individual stitches dotted through out the design and these can be easily overlooked. This happens especially when working on certain areas or if distracted or you struggle to follow a pattern.
Backstitch.
On the plus side with this design, once you have completed your last cross there’s no back stitch required.
In conclusion.
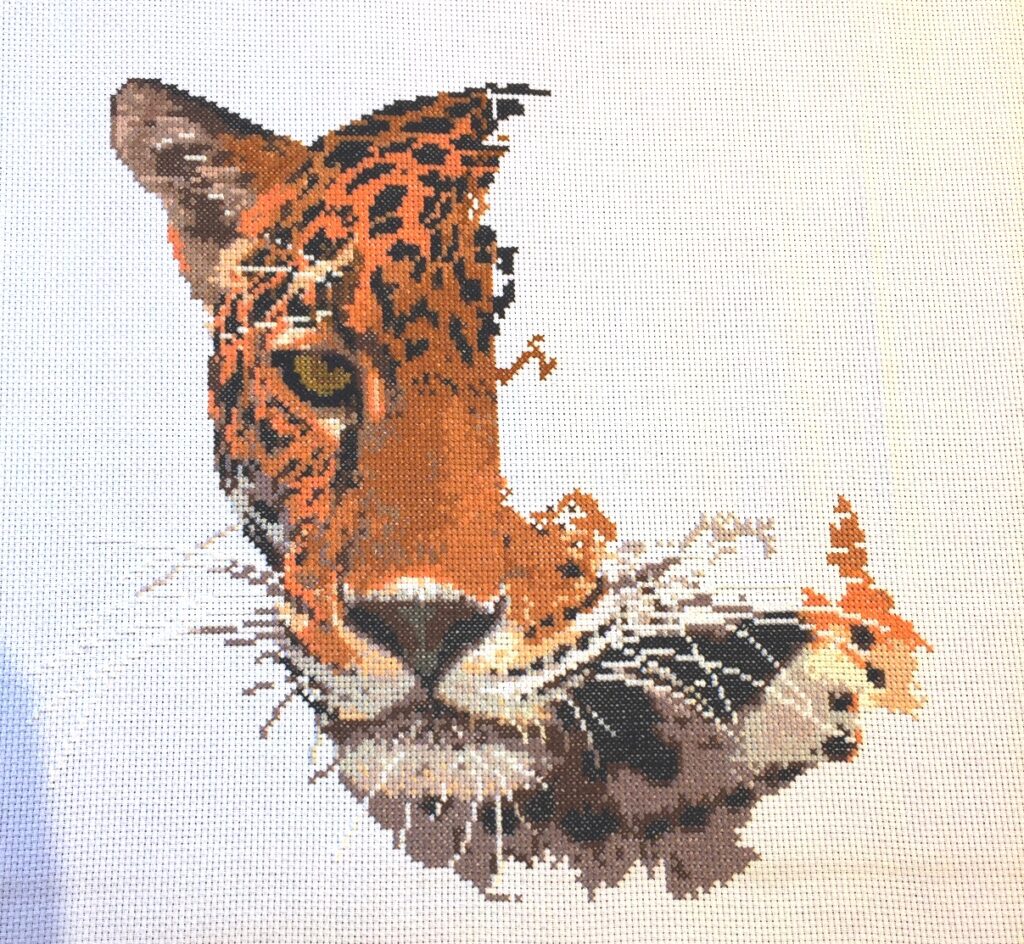
Apart from the pattern being slightly difficult to decipher in places and the colour discrepancy I enjoyed working on it. Overall when completed the Jaguar cross stitch design’s a beautiful piece but I would not recommend it for a beginner.
In terms of availability patterns can be purchased online but I would recommend checking all colour codes with the design picture before ordering any cross stitch threads.
Completed Graeme Ross Jaguar cross-stitch pattern.
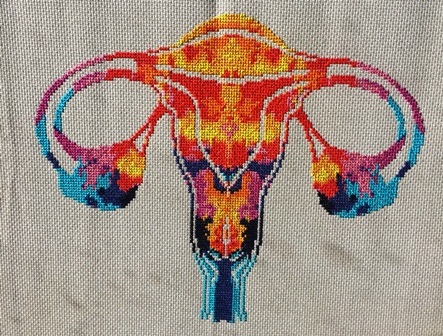
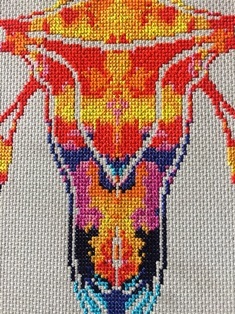
Pattern number 505 Uterus cross stitch pattern by NikkiPattern.
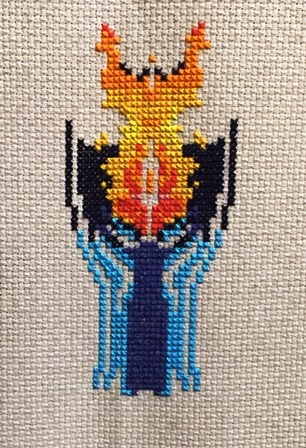
Probably the most colourful and interesting kit I have sewn in a while: Pattern No 505 Uterus Cross-Stitch pattern.
It has a grid size of 149 x 118 stitches on 14ct Aida.
It’s design area is 10.64″ x 8.43″ or 27.03cm x 21.41cm
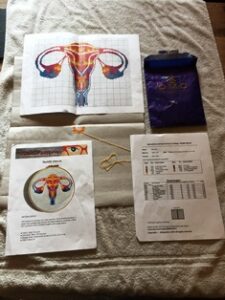
9 of brightly coloured DMC threads.
The design requires you to print off:
Colour preview of the finished design.
A large chart consisting of 2 A4 sheets.
Coloured DMC floss / symbol chart.
This Uterus Cross-Stitch kit arrived partially started, as shown in the image. Included were 9 DMC skeins, a pattern printed on two A4 sheets, stitch chart and preview of the finished project.
The pattern on the whole was fairly easy to follow. However, a certain degree of concentration’s required due to there being several individual stitches of varying colours throughout the design.
Depending on the print quality of the pattern a few symbols in close proximity to each other could easily be missed because despite them having different symbols the colours are very close. This means that if you are on a run of stitches and forget to count the rows but instead just glance at the pattern for reference you could easily mix them up, especially if you are working under artificial light.
For this design I first put the 14ct Aida onto a cross-stitch stand. I then started working from the bottom up which can be seen in the image.
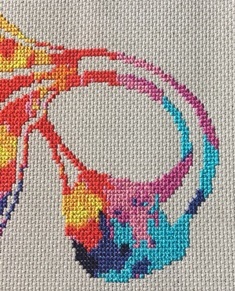
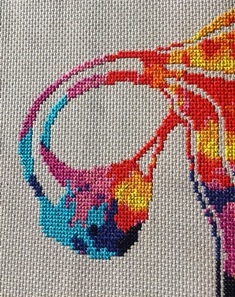
As the patterns symmetrical I worked from the right to the centre. However, depending on how you prefer to work, each section’s relatively easy to complete. Once one side’s completed replicating the other without using the pattern is simple.
Continue using this method throughout the pattern, as shown in the images below until the whole patterns completed.
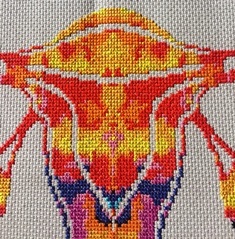
Uterus Cross-Stitch pattern, in conclusion.
All in all this is a fairly simple kit to complete and I would put the skill level at intermediate. I say this, because despite the simple easy to follow design a certain degree of knowledge on how to read and follow a pattern’s required. Also, as mentioned earlier there are certain areas that have individual stitches. Also, some pattern symbols have very similar colours when printed out. This might cause unintentional mistakes if the patterns not followed accurately. Especially, as also mentioned earlier, you are working under artificial light.
Having now completed my first anatomical cross stitch kit I decided to take a look online. I was amazed to see some really beautiful anatomical cross stitch kits available and may consider purchasing one myself.
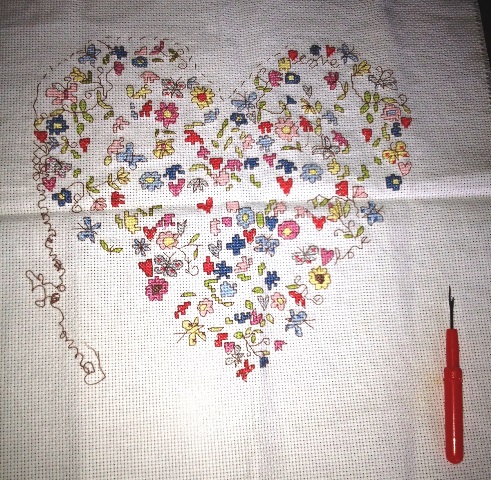
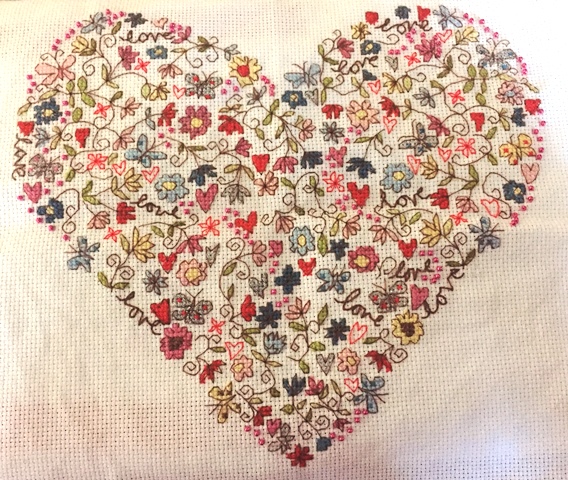
The kit, called Love Heart by Bothy Threads arrived almost completed. However the kit needed our immediate attention as our client contacted us because they had got themselves into a real pickle with the design and the backstitching, as shown below.
Unpicking of Love Heart by Bothy Threads.
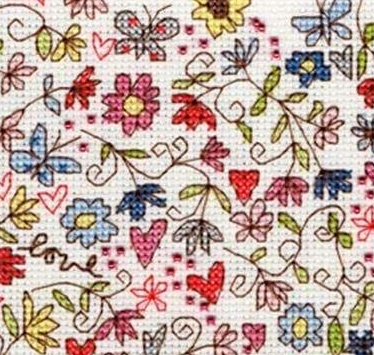
With kits like the Love Heart by Bothy Threads as shown, it is so easy to lose your way as the designs fairly intricate in that it involves a lot of strategically placed blocks of individual colours to build up the design. These blocks are then transformed into shapes and images once the back stitch is applied as can be seen in the close up sample of the design shown below, This image shows both the blocks of colour and how the back-stitch transforms them.
Close up stitching detail for Bothy Threads Love Heart Kit.
How to unpick cross stitch.
Example used Love Heart by Bothy Threads.
The first image shows the initial unpicking of the back stitching which our client had completely lost their way with.
When unpicking any type of stitching it is important that you do not catch the fabric. Catching the fabric and cutting the weave can be disastrous for your project. Sometimes if you are lucky or have a solid image you can hide the mistake but when unpicking a project such as Bothy Threads Love Heart which has spaces between the design, any Knicks in the Aida can ruin the project. This can result in the needing a new piece of Aida and having to start the project all over again.
When unpicking I prefer to use a stitch unpicker like the one shown. I find this type useful to get under the stitch before using the sharp edge on the inside edge to cut the stitch. However, on the back I prefer to use a fine needle to pick my way back through the stitches. I always try to follow the run of stitches and am careful at all times not to catch the fabric. I use a needle on the back as I find the stitch picker tends to be a little too wide for cross stitch. Especially if the stitch work is tight against the back of the Aida.
Following a cross stitch pattern.
With the majority of the back stitching now removed the next thing I noticed was that a lot of the blocks of colour were out of place. Several of the blocks of colour where either too high or too low. This was due to the client losing their way when following the pattern.
Bothy Threads Love Heart, how to follow a pattern.
When following a cross stitch pattern, especially one that has small blocks of stitch detail dotted all over it it is very easy to lose your way. With a pattern like this it is imperative that once you have established your center point you keep a close eye on all parts of the detail. Continually count each square as you stitch. Pick a point of reference then check and double check to ensure that all parts of the design are in the correct locations.
Never guess or assume where something goes. Once you are one square out, that’s it, everything else in the design from that point on will be wrong. Trust me, there is nothing worse than having to go back and alter everything. I admit that sometimes you can cheat a design with a little improvised cross stitch or back stitch. But with that said, on most occasions this will not be the case.
Rebuilding the Love Heart.
With all the obvious unpicking done I then looked carefully at the stitch pattern and checked it against the project. This was done so that I could establish a point of reference on the project to work from. The partially completed red flower at the bottom of the Love heart design was where I chose to start. Firstly I unpicked and then relocated and re-stitched the flower. Once completed I started redoing the backstitch while counting my way up the right side of the heart. Cross referencing the pattern and checking all the original stitching to make sure it was correctly located.
When coming across a part of the design that was wrong I either added to the design or relocated each block of colour until I reached the top right of the Love Heart. However, in order to maintain the integrity of the project I left as much of the clients work intact as was possible, despite it being slightly out of place. Mainly because I wanted to retain the clients personal touch in the work. It also did not distract from the overall design. With some minor tweaks to the back stitch it all worked well. Next, I carefully made my way across the love heart and up to the top left until all the corrections had been made and all the back stitch worked correctly.
How to add beads to a cross stitch design.
Example used, Love Heart by Bothy Threads.
With the whole cross stitch Love Heart stitch work completed the next thing to do was to add some beads. To add the beads, first, locate their position on the design. Next sew from the back through the first hole in the Aida where the beads located. This can be either the top right or top left. Next pass your needle through the hole in the bead and then back through the opposite hole on the Aida. Either the bottom right or bottom left. With that done next sew back through the opposite hole on the Aida and back through the bead finishing at the opposing top hole to form a cross and fix the bead in place.
Bothy Threads Love Heart cross stitch kit, before.Bothy Threads Love Heart cross stitch kit after.
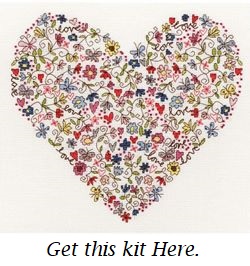
There’s several similar kits available from Amazon.co.uk or below.
This is the second Bothy Threads cross stitch kit based on the art of Kim Anderson that I have done. The last kit, called Love Blossoms can be seen in a previous post.
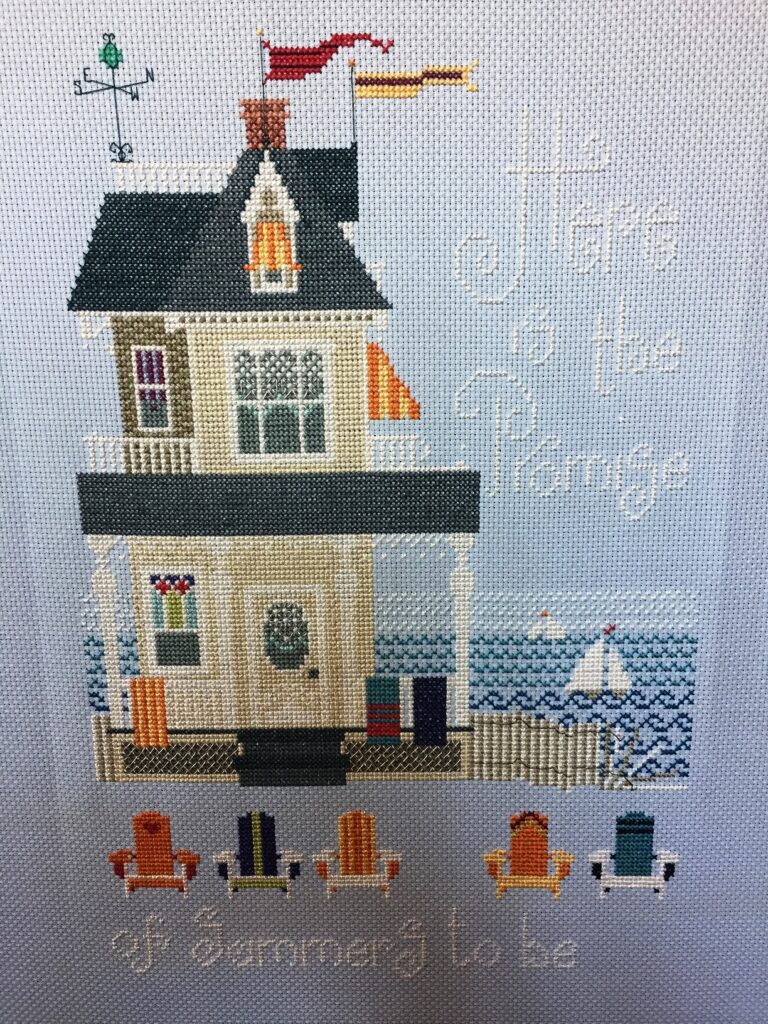
A Summer Place cross-stitch chart by The Cross-eyed Cricket; number 264 in the collection and designed by Vicki Hastings.
Summer Place Cross-Stitch is one of our latest customer commissions that we have had the pleasure to work on. The design conjures up a dream home by the sea and as stated on the well thought out design, “Here is the promise of Summers to be”.
For this particular project the client supplied a chart for which we needed to source all materials required to complete the design. The design can be completed using the options below.
Chart design area 128W x 189H
10 count with a design width of 12.8″ x “18.9
14 count (28 linen,) with a design width of “9.1 x “13.5
15 count (30 linen,) with a design width of 8.5″ x “12.6
16 count (32 linen,) with a design width of 8″ x “11.8
Stranded cotton yarns/threads for completing A Summer Place cross-stitch No:264
The yarns required for completing A summer Place by The Cross-eyed Cricket no 264 totalled 26 as listed below.
Blue: DMC 158 or Anchor 941
Periwinkle: DMC 341 or Anchor 117
Light Clay: DMC 407 or Anchor 914
Sky Blue: DMC 598 or Anchor 1062
Dark Clay: DMC 632 or Anchor 936
Tan: DMC 640 or Anchor 393
Dark Grey: DMC 645 or Anchor 273
Pale Blue: DMC 747 or Anchor 158
Blue: DMC 807 or Anchor 168
Sand: DMC 822 or Anchor 390
Navy: DMC 823 or Anchor 152
Dark Teal: DMC 924 or Anchor 851
Light Grey Teal: DMC 926 or Anchor 850
Sea Green: DMC 958 or Anchor 187
Pale Sea Green: DMC 964 or Anchor 185
Grey: DMC 3023 or Anchor 899
Yellow Green: DMC 3348 or Anchor 264
Pale Sky Blue: DMC 3756 or Anchor 1037
Marine Blue: DMC 3765 or Anchor 170
Grey Teal: DMC 3768 or Anchor 779
Aqua Blue: DMC 3810 or Anchor 1066
Dark Rose: DMC 3831 or Anchor 29
Dark Plum: DMC 3834 or Anchor 100
Orange: DMC 3853 or Anchor 1003
Sunset Yellow: DMC 3855 or Anchor 311
Soft White: DMC 3865 or Anchor 2
The yarns we chose for this project where from DMC as they are our preferred yarns to use however, Anchor yarns are also very good quality yarns.
Starting A Summer Place by The Cross-eyed Cricket.
A Summer Place Stage: 1
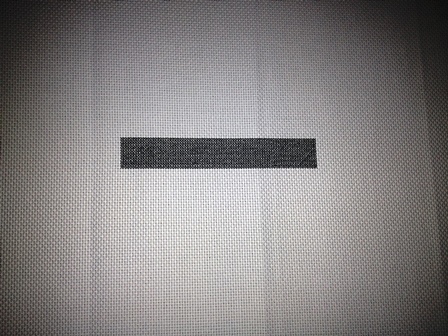
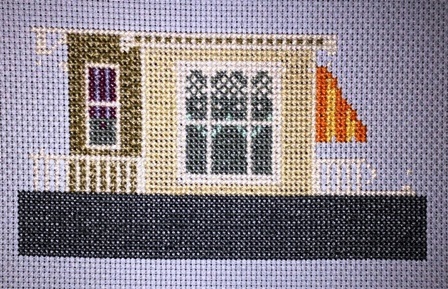
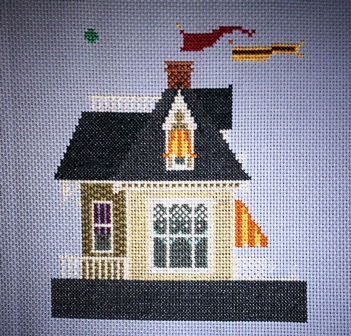
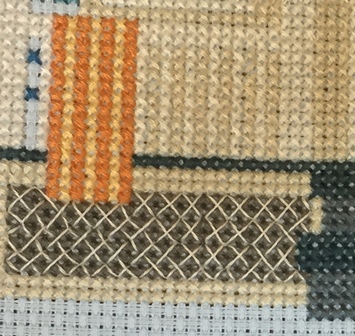
To start this project I first chose an easy starting point which was the long rectangular dark roof of the veranda/porch as can be seen in the first image.
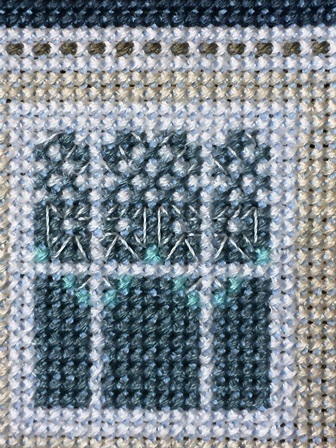
Once this was complete I worked my way up the design adding the first floor including the windows and railings up to the roof line. There’s quite a bit of detail both in the window design and the decorative fascia below the main roof line. There are also a few little details that need to be noticed at the top of the main window as the second row from the top of soft white (DMC 3865) frame is a stitch longer each side so be careful to take this into account when completing the main block of the lighter sand colour. Also as already mentioned there’s detailing in the main window and the smaller window to the left as can be seen below.
Stage: 2. A Beach House by the Sea.
After that, I moved onto the main roof. But pay attention to the stitch chart as the roof line varies on each side. Also there is a bit of detail in the dormer window. Likewise, he brick chimney has a chequered design making it stand out more and an interesting detail on the house. To the left of the big main window the wall is also of a double stitch chequered design consisting of blocks of Tan (DMC 640) and Grey (DMC 3023)
Cross-Eyed Cricket cross stitch kit. Stage: 3.
(The Cross-eyed Cricket; number 264)
A Summer Place by Viki Hastings.
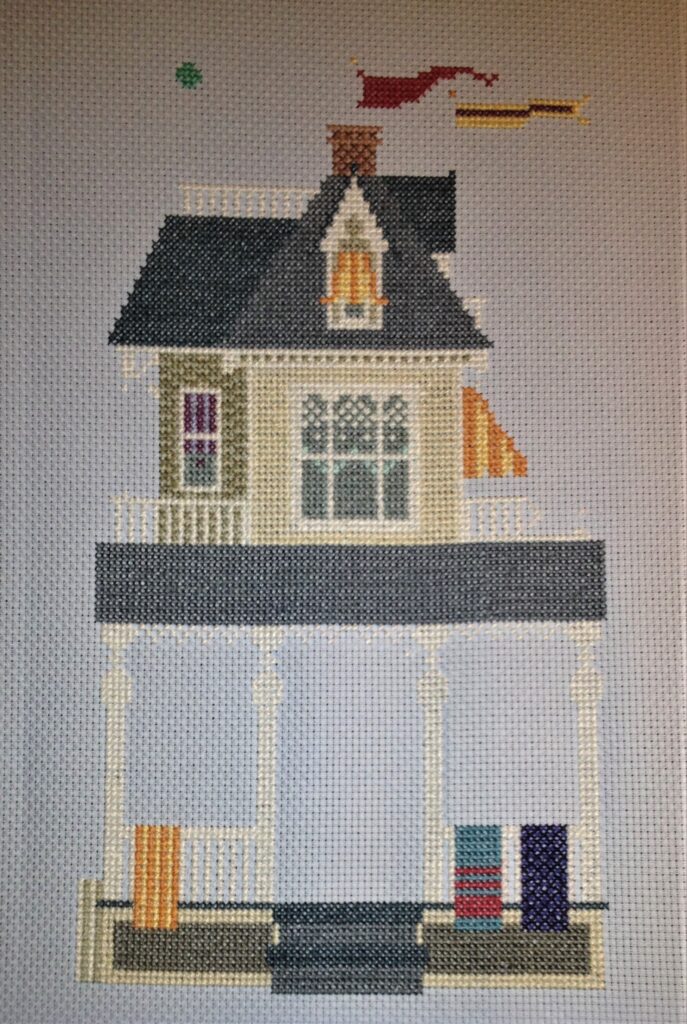
The next thing to do is to add the four pillars, make sure you count the rows and continually check the pattern. I found the easiest way to do these is to stitch from top right to bottom left down the pillars and then cross them back up to the top. By doing it this way it enables you to add the Fascia detail beneath the veranda roof as you go. There’s also an extra row of soft white stitches (DMC 3865) one row down from the blocks of four on the Fascia line but so as not to have to jump too far in a cross country fashion I made sure I left these un-stitched ready to be added in after I finished the Sand (DMC 822) coloured stitches in stage 4.
Next I completed the decorative railing and towels, then the steps and fence panels either side of the steps.
Stage: 4
A Summers place now slowly taking shape.
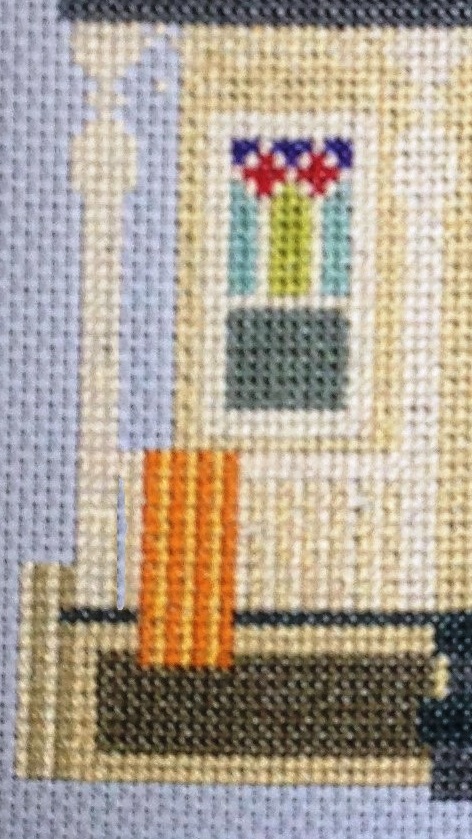
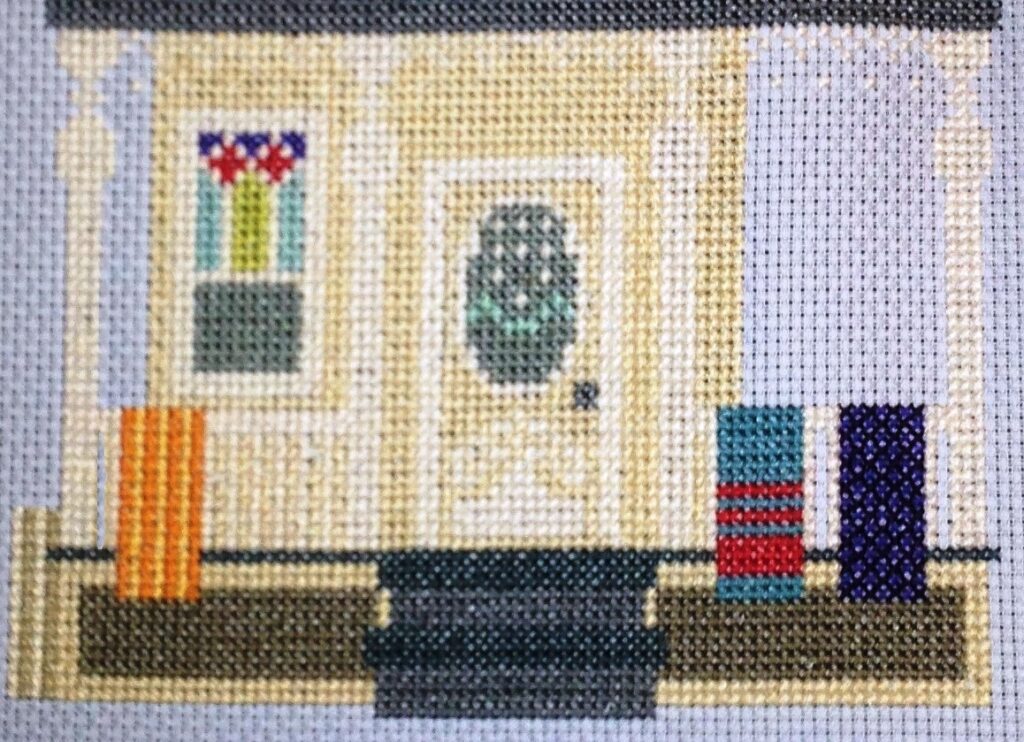
A Summer Place cross stitch, lower window detail.
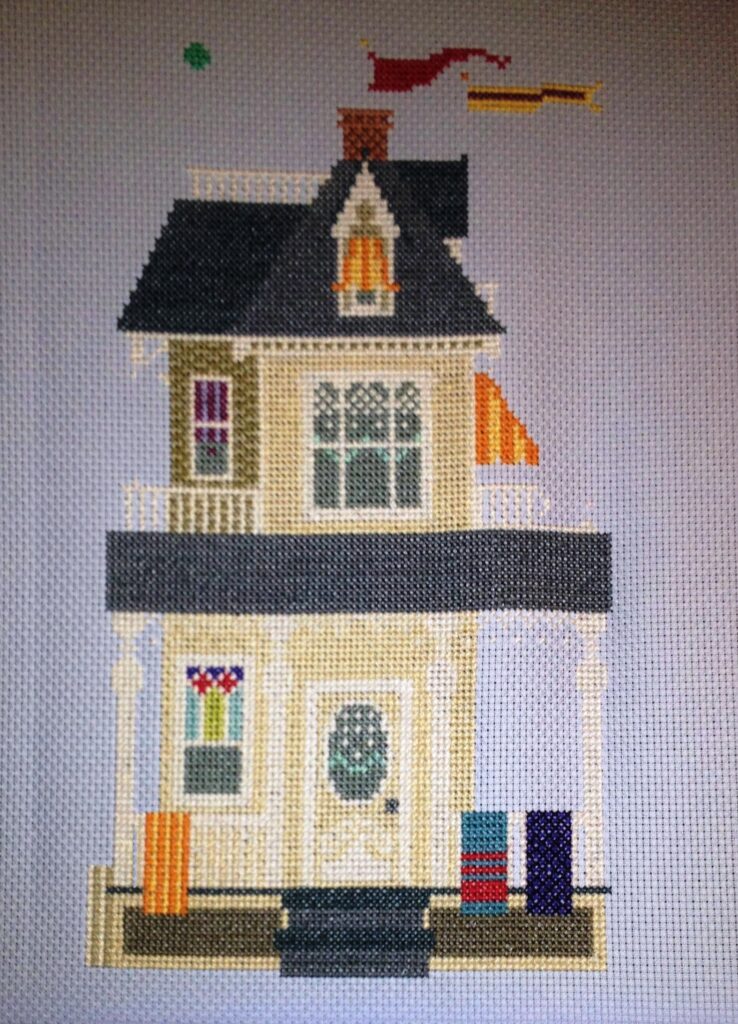
With the above completed it’s now time to fill in the details between the pillars. Start by first filling in between the two pillars on the left of the pattern.
As mentioned previously and shown on the pattern there is a row of white squares just above the window frame so when filling the block colour of, Sand (DMC 822) make sure you leave the relevant squares free to allow for them. I say this as I have found from my own experience that when filling in a block colour it is so very easy to get carried away and forget to leave individual squares for details such as these.
With the block colour of Sand done, now add the window frame in soft white (DMC 3865). Pay attention to the pattern as the window has rails as can be seen in the picture above. Once that is complete fill in the window again paying particular attention to the design at the top as shown in the picture.
The Cross-Eyed Cricket kit number 264
With the first panel complete repeat the process again for the second panel between the second and third pillar paying attention to the detail on the front door. Next move on to the third panel between the third and fourth pillar where there is again a row of soft white squares just below the Fascia line so be careful not to leave them out.
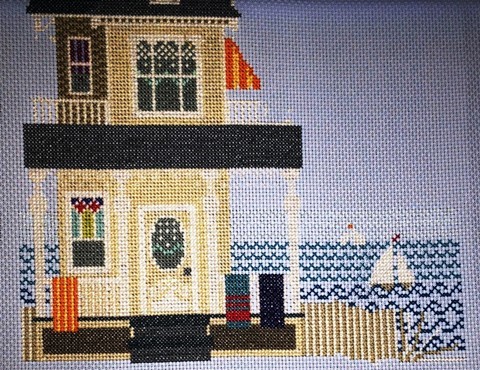
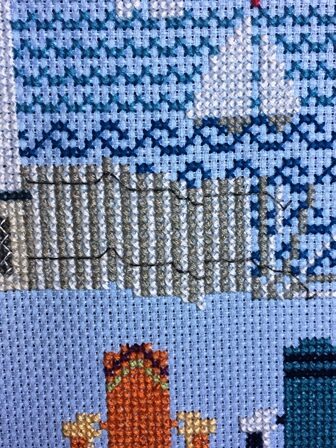
Stage: 5 Cross stitching waves.
A Summer Place by the Cross-Eyed Cricket water and fence details.
With the main house complete its now time to add the sea and other details to complete the main image. Start first with the top row of waves in Pale Blue (DMC 747).
A Little Cross Stitch Improvisation.
However, when stitching the first set of waves the Pale blue thread did not show up very well against the Sky Blue Aida. To overcome this I switched out one strand of Pale Blue for one strand of DMC Blanc, just to make the colour pop.
After completing the first block of waves work your way down, first doing the Blue waves (DMC 807) and then the Marine Blue waves (DMC 3765). With the last block of waves I found it best to add the small boats as I went so as to avoid making the back of the Aida untidy. Once that is complete add the fencing but make sure you pay attention to the pattern as the fence rails are staggered in places.
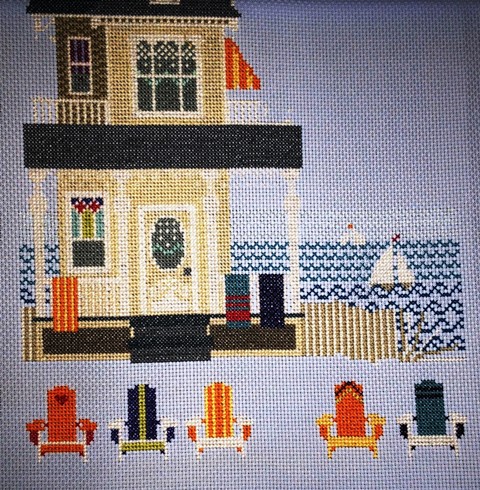
With all of the above complete it is now time to add the five luxury deck chairs. These where fun and quite easy to do and finished of the main image perfectly. However, there’s some half stitching on the first Orange chair (DMC 3853) that forms the heart in Dark Rose (DMC3831).
After that, all that’s left to do of the main stitching is to add the letters that form the phrase, “Here is the promise of Summers to be” The letters are sewn in Pale Sky Blue (DMC 3756). Each one’s pretty straight forward but pay particular attention to the placement and design of each letter and don’t miss out the dot above the I on the word Promise.
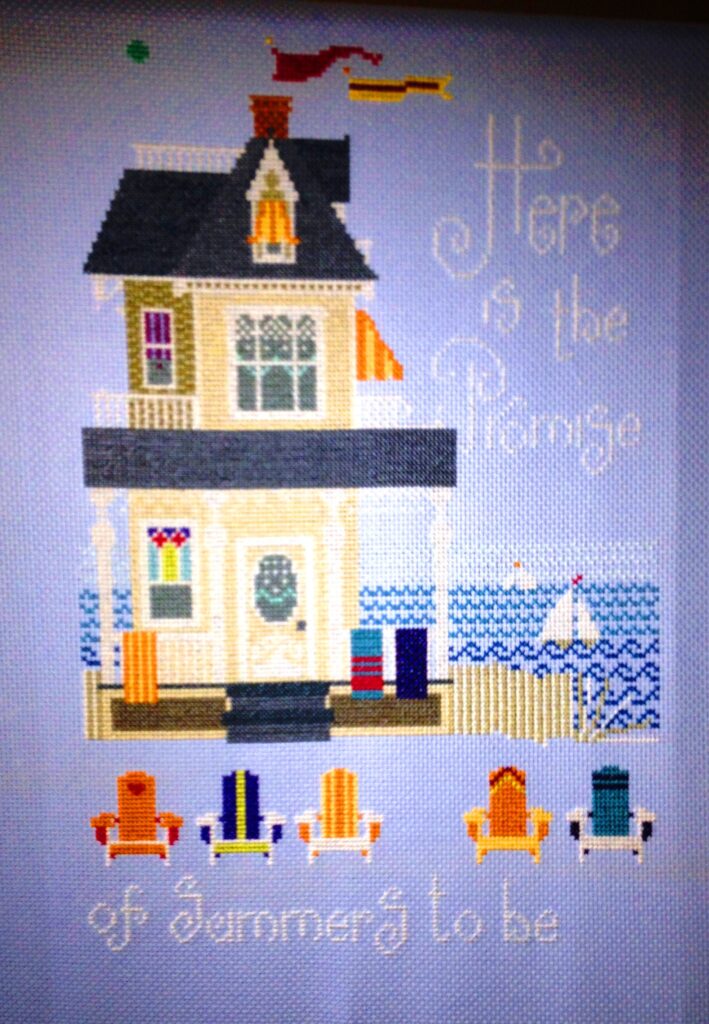
Stage 6: Completing the Back Stitch for a Summer Place from The Cross-Eyed Cricket Collection.
Here is the promise of Summers to be. By Vicki Hastings.
Finally, with all the main cross stitch work completed it is now time to add the back stitch details.
Be very careful when adding the Curtain detail that’s done in Soft White (DMC 3865). Similarly, the lattice work in front of the house, is Soft White, (DMC 3865).
The ‘blown up’ examples shown on the back of the main pattern show both the main window and front door. However, they’re not that clear because some lines are still voided by the grid making it best to reference the main pattern. Please also see the images below for back stitch examples for a Summer Place by The Cross-Eyed Cricket Collection.
A Summer Place Cross-Stitch kit back stitch detail examples.
Back stitch detail on window.
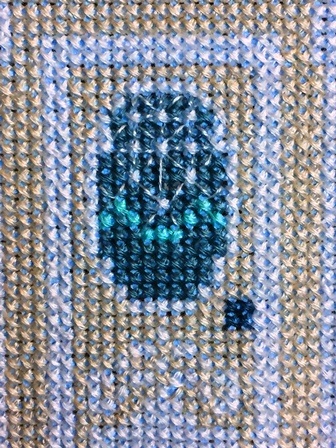
Stitching detail on door.
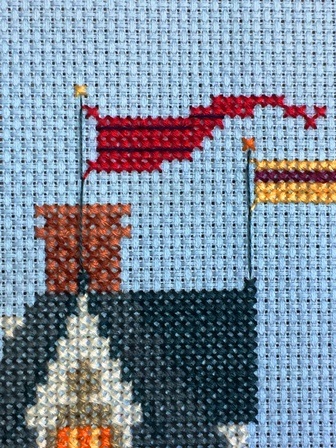
Back-stitch detail for flag poles.
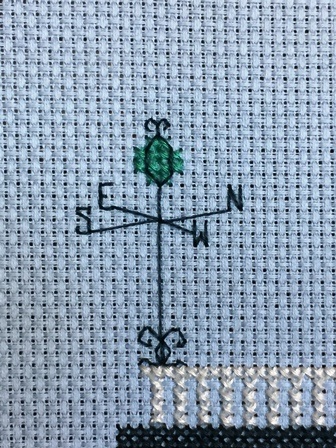
Back stitch detail for a weather vane.
Back-stitch detail for lattice work.
Back stitch detail for fence.
The three lines on the red flag that are completed in Navy Blue, (DMC823) which can be seen in the image below because they too are hard to see on the pattern. When doing the weather vane and flag poles Dark Teal, (DMC 924) pay attention to the flag ties – they are the same colours as the flags. In addition to this, the wire on the broken fence, which is Dark Grey, (DMC 645) is pretty straight forward.
A Summer Place Cross-Stitch completed cross stitch kit.
In conclusion, A Summer Place Cross-Stitch kit by Vicky Hastings and in The Cross-Eyed Cricket collection was a pleasure to complete but as I have mentioned several times you will need to follow the pattern carefully. I would not recommend this kit for a beginners cross stitch kit, but any intermediate or more advanced cross stitcher’s should be able to complete it.
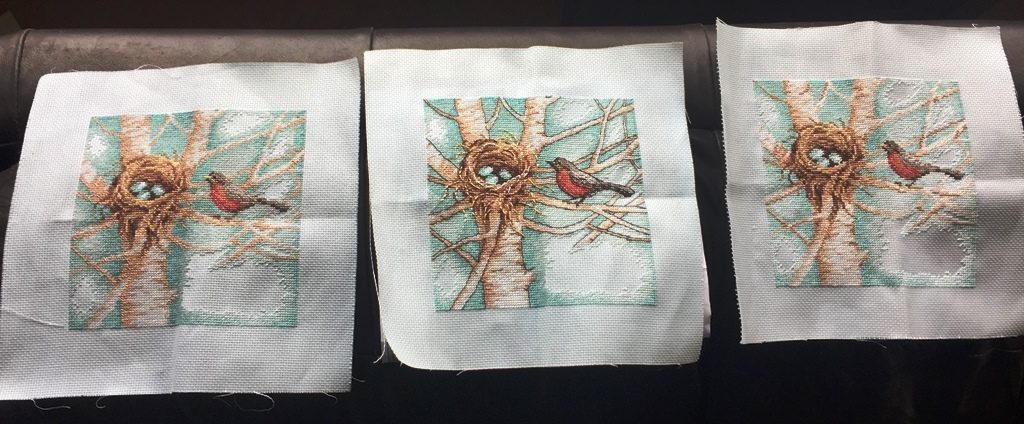
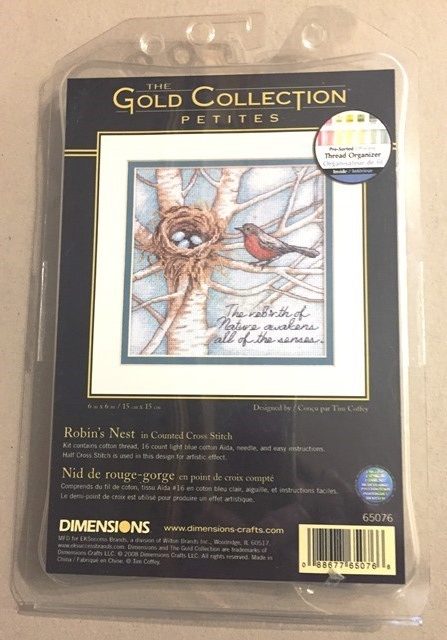
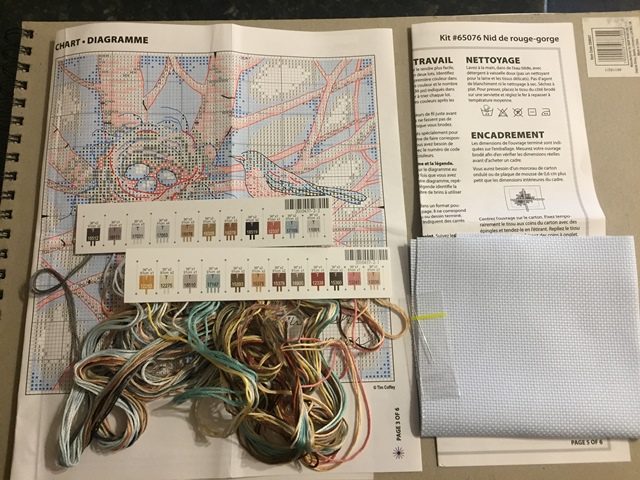
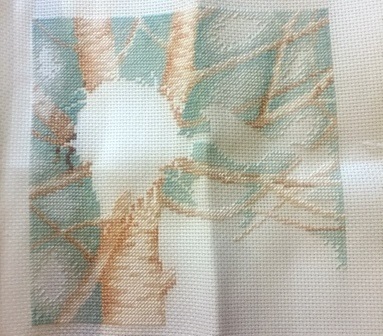
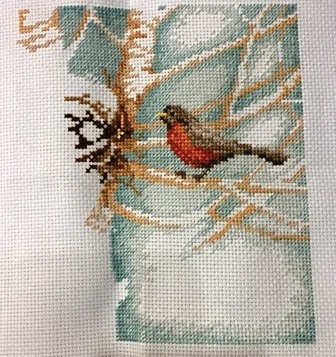
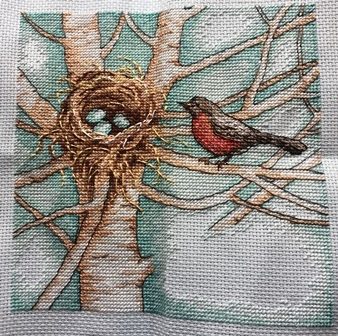
Robin’s Nest Counted Cross-stitch kit from the Gold Collection Petites, by Dimensions crafts. This kit is a 16 count cross-stitch kit with finished dimensions of 15cm x 15cm on light blue Aida.
This one was an unusual commission as I have never had to complete three identical kits for one client before. However, having completed all three I would rate the Dimensions crafts Robin’s Nest as an advanced cross-stitch kit.
I say this because a high level of concentration’s required at all times due to the intricate nature of the pattern. Also, I advise that a good source of natural light is used at all times. Plus, most of the two-strand thread colours consists of combining two colours for both full and half stitch which occur throughout the design. Each stitch type’s shown with the stitch chart along with the thread colour combinations and the type of stitch required. However, with that said, if you lose concentration you may find yourself doing full stitches where half stitches are needed. Resulting in a lot of unpicking.
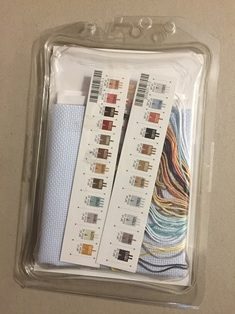
The kit shown contains a needle, 16ct light blue cotton Aida, threads and easy to follow instructions. The instructions are written in both French and English. Stitching instructions are provided for standard stitch, half stitch and French knots, used for the writing should you need them.
Threads Required for Robin’s Nest Cross-stitch Kit.
The cotton threads come attached to a colour-coded strip, shown in the picture. To select the threads I found it easiest to pull them from the strip in single strands as required. However, you may prefer to cut them. The kit contains 23 different colours in total with some being very similar to each other. For that reason, careful selection’s required to create the intended artistic effect of the design. However, one colour requires the combining of three strands. The kit itself contains ample amounts of thread allowing for a few mistakes should you make any.
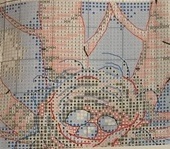
Robin’s Nest Cross-stitch Pattern.
The pattern for the Robin’s Nest Counted Cross-stitch is quite intricate. It requires excellent eyesight along with a high level of concentration as there are some very intricate areas that combine both standard and half cross stitch. There are also several areas where you will need to plan your approach in order to allow changes in direction with your needle to lesson stopping and starting a new run of the same colours.
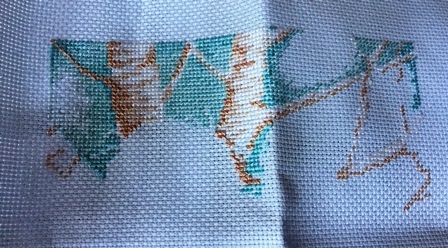
Various stages of completion of three Robin’s Nest cross stitch kits.
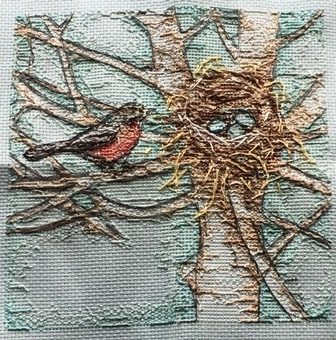
Back-stitch for Robin’s Nest Cross-Stitch Kit.
In total there’s six different backstitch colours required to highlight and define the image. Five of which use two strands of thread and one uses one strand.
Reverse view of finished back-stitch.
Again, you will need to concentrate as there are areas that require long stitches and several other areas that require short stitches to form the shapes around the nest, branches and other areas. With the longer angled stitches, I found it easier to look for where they touched on the intersections of the pattern.
To purchase a dimensions crafts Gold collection Cross-stitch kit in the UK please see here.
To purchase a Dimensions Gold collection Cross-stitch kit in the US please see here.
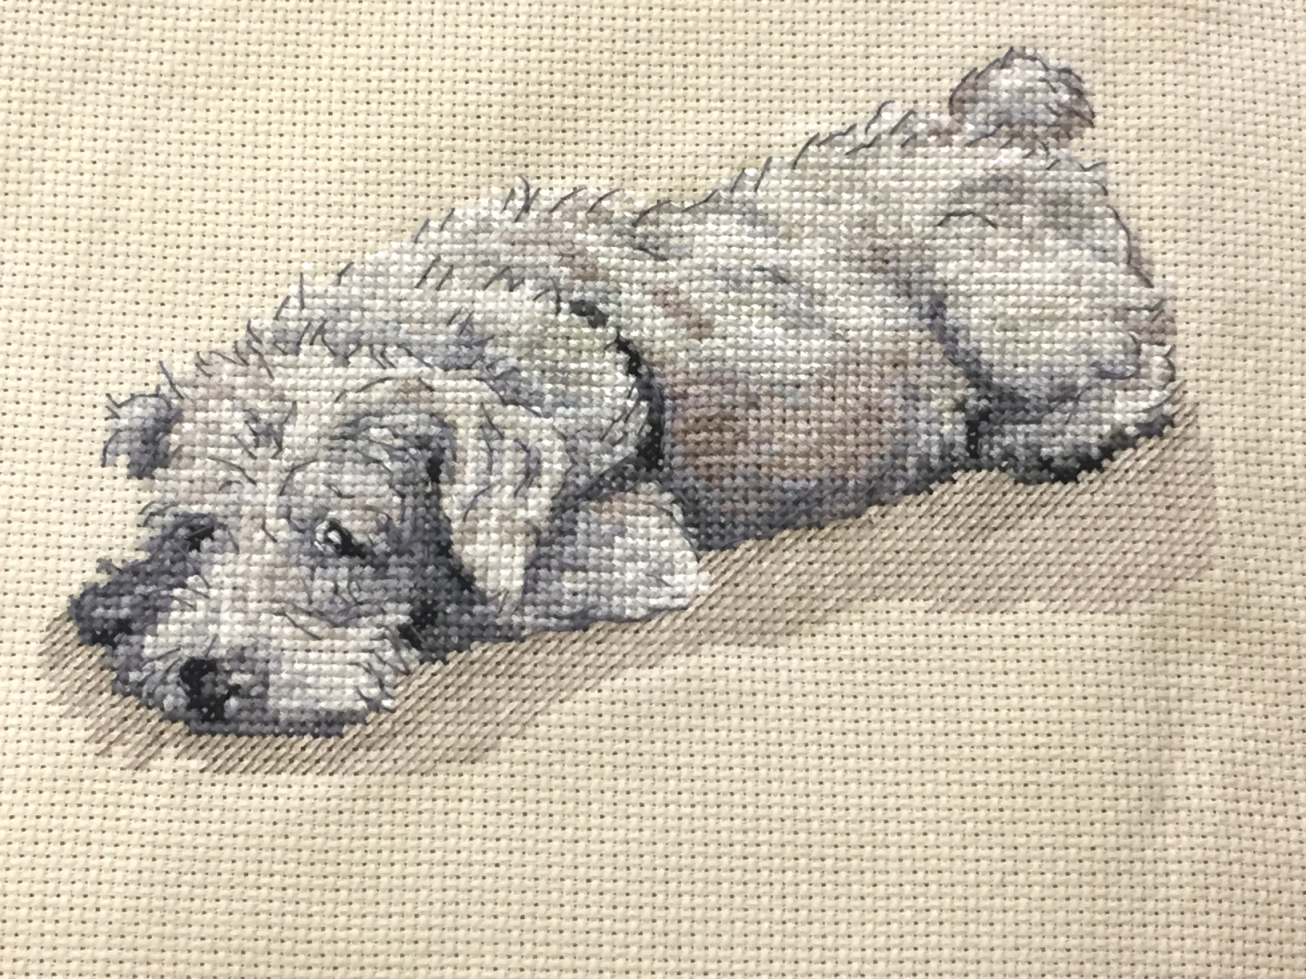
Man’s best friend by Cecil Aldin are a series of cross stitch kits by CWOC Stitch.
This kit is called Murphy and is one of the many beautiful kits in the Man’s Best Friend series. Its my most recently finished client request and I apologise for not uploading it sooner.
About the Man’s best Friend kit.
The kits themselves are lovely and are based on the illustrations by Cecil Aldin (1870 – 1935). Cecil Aldin was one of the best loved and most prolific book illustrators working during what was so-called the Golden age of illustration. Aldin, himself wrote and illustrated scores of delightful books for children based on the antics of mischievous puppies, as well as more auto biographical works featuring his own menagerie.
In this man’s best friend kit the thread colour groups are all very similar. There’s lots of small detailed areas requiring close attention when following the pattern making it hard to get into a rhythm when stitching. Especially the Blanc and light grey colours, as its hard to distinguish between one and the other against the Aida. This also makes it hard to tell where you have stitched previously or not. All other shades only vary slightly when grouped together making following and marking the pattern with meticulous accuracy a must.
Doing the back stitching.
When back stitching, the single thread of back stitch is hard to see in places, especially over the darker areas. This makes it hard to see if it has been done. Good natural light is also essential.
I would definitely not recommended a Mans Best Friend kit to anyone who is new to cross stitch. Also if you have trouble with your eyesight or have very low concentration levels do not attempt this kit.
To buy Man’s Best Friend kits in the UK Click here!
To buy Man’s Best Friend kits in the US Click here!
I have now completed my next project, another lovely kit by DMC, called Bedtime Boofle Bear. It will now be winging its way back to its owner in the UK. Dmc have a wide range of beautiful cross stitch kits which you can view or purchase here.
You can buy this kit here.
What’s in the Bedtime Boofle Bear kit?
This Boofle Bear Sampler is a 14 Count Cross Stitch Kit
and contains the blank Aida, needle and presorted good quality threads along with fully charted instructions.
The kit is quite easy to complete and I would suggest that it is ideal for anyone who has had some cross stitch experience because there are some half stitches and quite a lot of backstitch detailing which I found quite fiddly particularly on the stars. I preferred completing each star as I went because the thought of having to go back to it was quite daunting.
For customer privacy, I have had to scribble out the name and date of birth of the lucky little girl. I did find that the name box on the sampler only allows you to place your child’s first name. However, with some adjustment, I managed to fit the date of birth also as requested by the customer.
There are several beautiful Boofle Bear kits by DMC, like this one – which you can view by clicking on the large image above. Having looked at them I think Bedtime Boofle Bear, for me, is by far the cutest.
As with most of the DMC kits I have done, this one had easy to follow instructions and stitching charts. As with all DMC kits, the threads were of a very high quality.
If you would like to purchase this kit for yourself you can do so by clicking the link in the picture at the top of this page.