• Customer projects completed

    Cat Stack Cross Stitch kit.

    Cat Stack cross stitch kit by Bothy Threads.

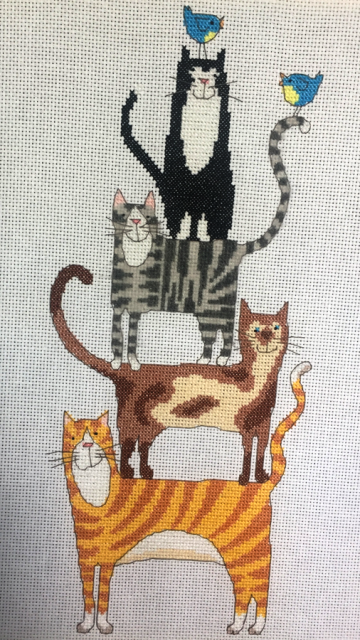
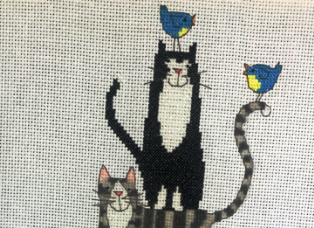
    For Cat Lovers Everywhere: Cat Stack cross stitch kit from Bothy Threads.

    Where to buy Cat Stack cross stitch kit by Bothy Threads.

    Kit contents:

    • 14 count white Zweigart Aida
    •  pre-sorted stranded cotton
    •  ‘Lana’ (a woolly thread)
    • a needle
    •  stitching diagrams
    • completion instructions.
    • Finished size 18 by 34cm. This kit uses full cross stitches, backstitch and a few French knots.
    Also available, Dog Stack Cross stitch kit.

    Cat Stack’s one of a series of cross stitch kits developed from original artwork by Kate Mawdsley Kate Mawdsley.com

    The kits fairly straight forward in terms of the cross stitching and backstitch and would be ideal for beginners. All the crosses are full stitches. The backstitch can be completed in long runs, as it is a modern pattern. This makes this the backstitch quicker to complete than some other backstitching designs.

    French knots.

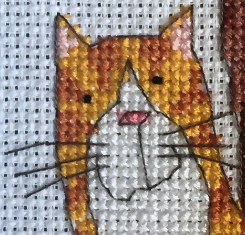
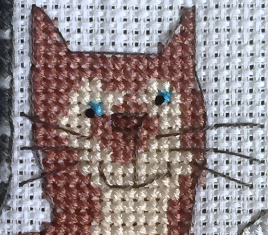
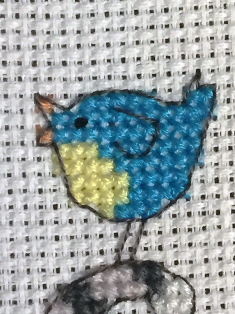
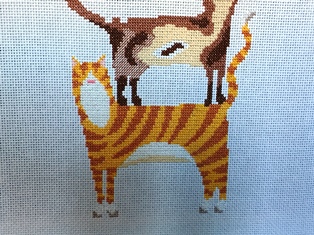
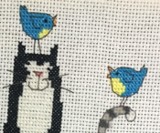
    The only advance stitch you may need is a French knot to complete the cat’s eyes. Once the French knot is mastered, depending on your skill level, the overall effect is wonderful. It really gives each cat (and the birds) different personalities.

    However, When positioning the French knots, be careful not to position them incorrectly. Doing so just makes the cat’s look ‘odd’. With that said, don’t be afraid to undo it and have another go. Try offsetting them from the holes if necessary to achieve the look you require. For a quick tutorial on ‘How to tie French Knots’ See HERE!

    Lana thread used in Cat Stack cross stitch kit

    How to fluff up Lana thread when Cross stitching. Kit example is Cat Stack cross stitch kit by Bothy Threads
    Fluffing up Lana threads for Cat Stack cross stitch kit.
    Image showing fluffed up Lana thread.

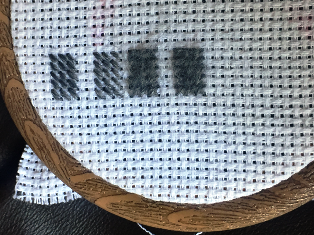
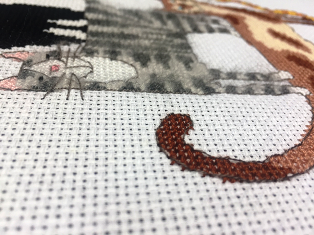
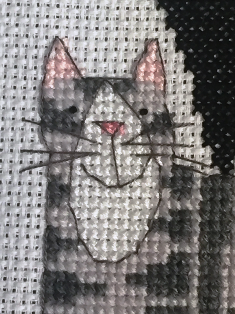
    This kit contained a first for me – Lana thread. I have never worked with Lana threads before which made it interesting to use. Also, I found them to be thicker than stranded cotton that’s normally used in most cross stitch kits and has the appearance of pure wool. On completion of the stripy grey cat, the Lana thread’s ‘fluffed up’. To achieve this rub a piece of velcro across it carefully. So as not to damage the yarn but to give it a fluffy appearance. You do need to be cautious about not catching the stranded cotton face and paws with the velcro. I would recommend practising fluffing up the Lana on a spare piece of cloth or Aida as shown in the image.

    Cat Stack cross stitch kit Pattern and Instructions.

    The stitching instructions are very clear and set out the order in which things should be done, both for stitching the design. They also explain how Bothy Threads stitched the design along with some useful top tips.

    The pattern chart is clearly printed on two lots of two A3 sheets of paper.  With one set of two for the cross stitching chart, and the second set for the backstitching and the placement of the French knots. Charts can be marked off as you stitch although I found it unnecessary as the design is in blocks of colour requiring only a few needle changes. Overall Cat Stack was a joy to stitch with different techniques, the use of Lana, French knots and delightful colours.

    Unfortunately, this particular project required the purchasing of more of the stranded cotton owing to the need to unpick my client’s work as sadly it had been started in the wrong place. Also, it was a little tangled so the threads were unsalvageable. This meant that, even though excess threads had been given in the original kit, there was not enough extra of one of the colours.

    Image Showing incomplete stitching. Where to get a Cat Stack cross stitch kit.

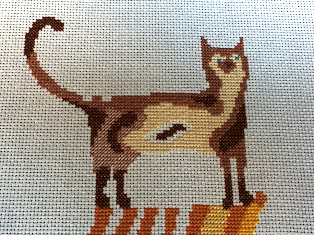
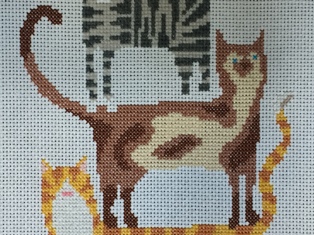
    The brown striped cat  (cat 1) with some stitching unfinished while I waited for the cotton to arrive.

    The Threads used in this kit are Mouliné Madeira threads.

  • Customer projects completed

    Cross Stitch Pako Dolls House.

    Cross stitch Pako dolls house.

    This cross stitch Pako dolls house is my most challenging project to date.

    cross stitch Pako dolls house

    Pako Dolls House cross stitch kit
       Purchase the original kit here.

    This was, by far, my most intricate project to date (excluding Tinkerbell which was my own personal gift to my daughter and can be seen here as an earlier project).

    This cross stitch Pako dolls house came as a homemade kit. It contained a photocopied set of patterns and DMC yarns. All colour codes had been customised to suit the threads available with some needing improvisation to complement the design. This required me having to purchase a few extra coloured skeins at cost.
    The photocopied patterns were of a poor quality and appeared to have been stored for quite some time. Therefore before starting a lot of research was required to ensure that everything was correctly placed and all the correct colours and back stitching were in the right places.
    Some of the cross stitches had been started using a single thread of yarn which I have shown below.

    The first thing I needed to do was to check the cross stitch for alignment with the pattern. Once I was sure that everything was correctly placed I could start the dolls house. Firstly completing the outline of the building and creating each separate room within the design. I started with the top left attic room and then carefully worked my way across and down the building, first doing all the cross stitch and then the back stitch so as to make sure each room was complete before I moved onto the next to ensure minimal contact with the stitching already completed. You can see my progress in the images below.

    Dolls house the second floor.

    With the top floor attic rooms now completed I moved on to the second-floor nursery and bedroom. With the staircase being already started it just left the dark brown cross stitch and back stitch details to add.

    Following on from the nursery and bedroom I then did the first-floor master bedroom, landing and bathroom.

    Dolls house first floor.

    Dolls house ground floor.

    My next task was to tackle the ground floor study/parlour room, kitchen and front door.
    I first tackled the stonework detailing and handrails followed by the kitchen, front doors, study/parlour and then the steps. Lastly, I added the garden details.

    Due to the intricate nature of the cross stitch pako dolls house project and because I had to cross reference the pattern I had with the information I’d found on the internet, I made sure I completed every detail in each room before I moved on to the next section. This included all cross stitching, half stitching and back stitch.
    I would not recommend this kit for beginners due to the size of the item. With a good quality pattern to follow each room is fairly simple but the eye for detail and level of concentration required is not for the faint-hearted. If you would like to try the kit yourself you may be able to purchase it by clicking on the image below.